
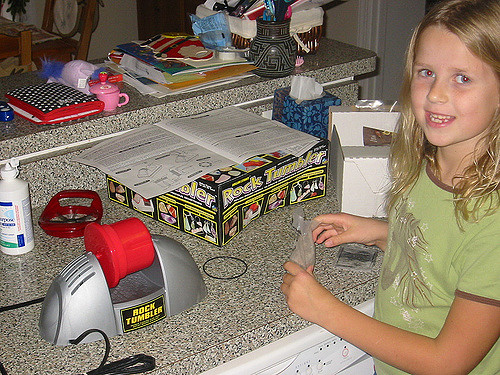
Lapidary Fundamentals: Gemstone Tumbling
Gemstone tumbling is the simplest and least expensive lapidary art to learn. These guidelines can help you choose the right equipment and get started.
8 Minute Read
Preliminary Considerations
Stone Sizes
In order for the tumbling action to work, you must place stones of various sizes in the revolving barrel. They need to range from not more than half the diameter of your barrel to about 1/10th the size of the largest stone. You cannot simply put a few large pieces in the tumbling barrel and expect them to come out nice.
Simply gathering stones in an assortment of sizes isn't too challenging. If all the sizes you need aren't readily available, simply use a hammer to create them. However, if you intend to work with stones the size of melons, you'd better be prepared to gather a lot of filler!
Interested in this topic?
This article is also a part of our Professional Gemologist Certification Course, in the unit An Introduction to Gemology.

Tumbler Size
Knowing what you want to polish and the size range of the stones you need will help you determine what size tumbler to buy. The largest stone you can finish will be about half the diameter of the barrel. Therefore, your least expensive models with a barrel four inches in diameter can only finish two-inch diameter stones. Moving up to a machine twice that size will cost twice as much and require twice the abrasives and filler. For the serious lapidary, this is a reasonable investment. For the part-time hobbyist, it may not be worthwhile.
Consider how often you plan on using your machine. For example, if you just want to polish a couple of dozen agates you found on vacation, you might not need a machine large enough to do them all at once. With a smaller tumbler, you may have to process your stones in two or more batches. However, if the gem tumbling machine is going to sit idle most of the time, purchasing a larger unit would be a waste of money.
Gemstone Hardness
All the gemstones in your barrel need to have the same hardness. Harder stones will scratch softer ones. If you have even one stone in your tumbler that's harder than the rest, it will scratch everything else in the barrel. (Of course, stones used just for filler can be softer that the gems you want to polish, since it doesn't matter if they're scratched).
Measuring the hardness of your rocks may seem daunting but can be accomplished with simple tools. A pocketknife is about 6 to 6.5 in hardness. A file is closer to 7. You can also assemble a set of stones of known hardness value for your testing.
Materials of the same hardness won't scratch each other. Therefore, you can use one stone to test rough of the same kind. For example, if you want to tumble some agate pieces, use one to scratch the others. The piece shouldn't scratch any of them or show any wear itself. If it does wear away on a stone, that piece is harder and shouldn't be included in your tumbler.
Not all stones will take a polish, just the harder ones. A simple field test will save you from bringing home a lot of useless rock. Try scratching them with a pocketknife. If you cannot scratch the specimen, it will take a polish. You will find other potential prizes are nothing more than compressed mud. Not only will they not take a polish, they'll create quite a mess!
Noise
Location, location, location. That saying isn't just for real estate. You need to consider carefully where you're going to place your equipment. Gemstone tumbling machines are noisy and run 24 hours for days on end. Lortone makes tumblers with rubber barrels to minimize the noise. While this helps, they're still noisy. You need more than one wall between your bed and the tumbler if you want to get any sleep. If you're using a machine with a steel barrel, you'll need more than that! Don't forget about your neighbors, either. Simply putting the tumbler in the garage may help you sleep but won't ingratiate you with them.
If you don't have a secluded room or basement, consider making a container for it. A cardboard box lined with styrofoam or covered with an old blanket will reduce the sound considerably.
Choosing A Gemstone Tumbling Machine
There are two kinds of tumblers: rotary and vibratory. Rotary tumblers are the most well known. You can find them at any rock shop, scientific supply house, toy store, and, of course, online. They're the least expensive variety and come in the widest range of sizes.
Vibratory tumblers shake the ingredients, rather than rolling them over each other. They have the single advantage of being faster. What would take weeks in a rotary tumbler can be done in a couple of days in a vibratory. They also have a significant disadvantage. The barrels don't stand up to coarse tumbling and wear out quickly. Hence, these are usually reserved for finishing gems and aren't recommended for general purpose use.
Budget for an extra barrel for your machine. Reserve it for polishing only. This is especially important if you're using a rubber barrel. They're very difficult to clean completely. If you have any abrasive, even one or two little pieces, left in the barrel when you try to polish, it will scratch your stones. They'll look awful, and you'll have to go back, clean the barrel more thoroughly, and polish them again.
Successful results have more to do with your choice of abrasives than the machine. Most companies that sell gemstone tumbling machines also offer abrasives in a kit. They may even be included with the tumbler. Polishing kits are recommended for beginners. As you gain experience, you can try different polishes and combinations and save money by purchasing in quantity.
Gemstone Tumbling Procedures
The instructions that come with the machine you purchase will be much more specific than this article can be. I recommend following those instructions. However, here is a general outline of how the process works.
Heading 4
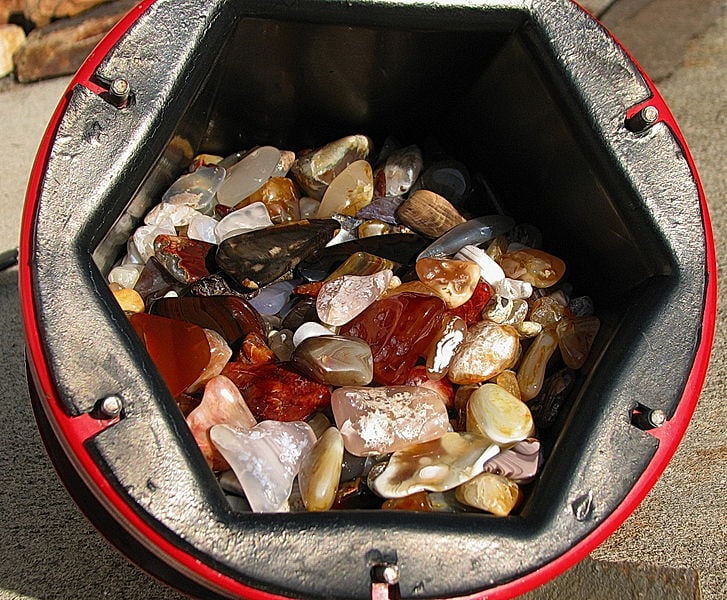
- Fill the barrel 2/3 to 3/4 full with stones. Make sure that they're all the same hardness and in an even variety of sizes. For example, if your largest stones are three inches in diameter, there should be just as many two-inch stones, one-inch, one-half and one quarter-inch stones. These proportions are by volume, not by count.
- Next, add water to the top of the stones. Measure the proper amount of abrasive and put it in. Put the top on the barrel and start it in motion.
- This tumbling motion stage will take about a week. However, you should open the barrel and inspect your stones every day. Some stones release gases that build up inside the barrel. They could blow the top off the barrel and create a real mess. Simply opening the barrel every day should prevent this.
- Keep track of your progress. The only way to do this is to take a few stones out, rinse them off, and have a look at them. Seeing the daily changes also adds to the fun of the project. Do not rinse your stones in a sink. Take them outside, instead. The waste from your tumbler (also known as "the plumber's best friend") can plug up a drain quickly.
- When your stones are all nicely rounded and have no angular surfaces left, it's time for the next stage. Take them outside, place them in a colander, and rinse them thoroughly. Wash the barrel out completely using soap, not just water. You need to get all the coarse grit out before moving on to the next step.
- Place the stones back in the barrel and add water to the top of the stones. Don't fill to the same level as before. Your stones are now smaller and won't fill the barrel as high. For the abrasives to work properly, your water level needs to be to the top of the stones in every step. If you didn't have quite enough stones in the beginning, you'll now be short. You may still be able to finish, but it will take longer, as there isn't as much friction as when the barrel is properly filled.
- Add the proper abrasive and set the gemstone tumbling machine to work again.
This second step is usually done with fine grit silicon carbide. It also takes about a week. As in the first stage, you should inspect your progress daily.
When Should You Stop Tumbling?
The process is complete when all the coarse scratches are removed and the stones are silky smooth.
The instructions for gemstone tumbling will vary on what comes next. Some will go directly to the polish stage. Others will have a pre-polish first. Just follow the instructions. Regardless of which step you're on, the procedures remain the same. Clean the stones and barrel outside. Replace them. Add water and abrasives, then set the machine to work. Check the progress daily.
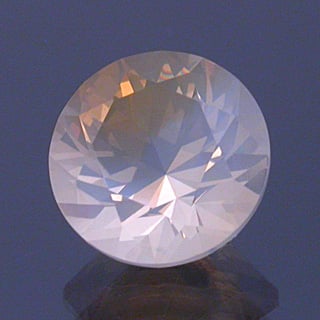
If you're using a pre-polish, your work will be complete when the stones have a smooth and satiny surface when dry and look polished when wet. In the polishing stage, you're finished when they sparkle and shine from every direction. If you're ever not sure if your stones are done, give them an extra day or two. More time won't hurt them, but too little will result in a substandard polish.
The whole process will take approximately a month to complete, although the actual work is only a couple of hours. If you go away for a few days, you can simply turn the tumbler off and restart it when you come back.
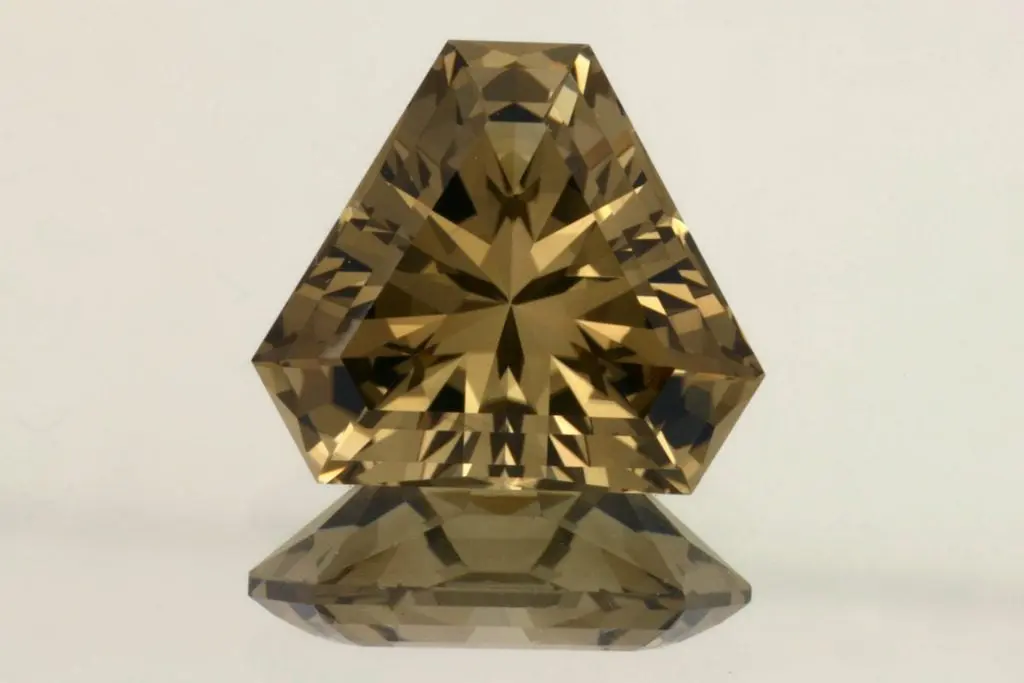
Conclusion
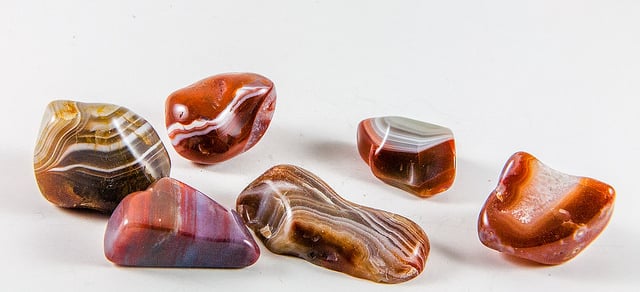
As with any lapidary project, that final day will make it all worthwhile. You've spent considerable effort in all the preliminary stages. While watching the progress is fun, the best reward is when you dry your stones and they glisten with vibrant, beautiful colors. They're now a delight to the eye and a welcome gift for friends and family.

Donald Clark, CSM IMG
The late Donald Clark, CSM founded the International Gem Society in 1998. Donald started in the gem and jewelry industry in 1976. He received his formal gemology training from the Gemological Institute of America (GIA) and the American Society of Gemcutters (ASG). The letters “CSM” after his name stood for Certified Supreme Master Gemcutter, a designation of Wykoff’s ASG which has often been referred to as the doctorate of gem cutting. The American Society of Gemcutters only had 54 people reach this level. Along with dozens of articles for leading trade magazines, Donald authored the book “Modern Faceting, the Easy Way.”
Related Articles
A Guide to Gem Cutting Styles
Gemstone Faceting Terms: A Glossary for Students
Lapidary Fundamentals: Gemstone Faceting
Suiseki, Glyptography, and Other Rock Artistry Techniques
Latest Articles
Chabazite Value, Price, and Jewelry Information
Recutting Diamonds and Colored Gemstones
A Step-Cut Montana Sapphire Design
How Old Is My Zircon?

Never Stop Learning
When you join the IGS community, you get trusted diamond & gemstone information when you need it.
Get Gemology Insights
Get started with the International Gem Society’s free guide to gemstone identification. Join our weekly newsletter & get a free copy of the Gem ID Checklist!