Introduction to Faceting Mini Course
The Importance of Precision in Faceting
Picture a diamond sparkling under lights, throwing rainbows across the room. Now imagine that same stone looking dull and lifeless. What makes the difference? The answer lies in precision—the exact angles, perfect symmetry, and flawless polish that transform a rough crystal into a brilliant gem.
Faceting is both art and science. Every angle must be calculated to work with the stone's optical properties. Every facet must align perfectly with its neighbors. Every surface must be polished to mirror perfection. Even tiny mistakes can turn a potentially stunning gem into a disappointing one.
In this article, you'll discover:
- How precise facet angles trap and redirect light for maximum brilliance
- Why the pavilion angle is the most critical decision a gem cutter makes
- The surprising discovery that shallow crowns actually increase brilliance
- How to spot the difference between expertly cut and poorly cut gems
- Real examples of what happens when angles go wrong
How Facet Angles Impact Light Performance
The Science Behind the Sparkle
When light enters a gemstone, it begins a complex journey through a precisely engineered optical system. The stone's refractive index—how much it bends light—determines what happens next. Think of it like a sophisticated funhouse mirror designed by nature and perfected by human skill.
If facet angles are cut correctly, light bounces around inside the gem like a pinball in an expertly designed machine. Each reflection follows the laws of physics, bouncing from one facet to another before shooting back out through the top. This creates the brilliance and fire we prize in fine gems—brilliance being the return of white light, and fire being the separation of that light into rainbow colors.
Each gemstone material has a unique "critical angle" based on its refractive index. This critical angle is the point where light either reflects back into the stone or escapes through the surface. Cut the facets at the right angles, and light gets trapped inside, reflecting back to your eye in a dazzling display. Cut them wrong, and light leaks out the bottom or sides, leaving you with a lifeless, dull stone that fails to capture attention.
The relationship between refractive index and cutting angles explains why different gem materials require different approaches. Diamond, with its exceptionally high refractive index of 2.42, can handle different angles than quartz, which has a much lower refractive index of 1.54.

The Magic Number: 42 Degrees
Here's where precision becomes absolutely crucial. For almost all colored gemstones, 42 degrees is the magic number for pavilion facets—the angled surfaces on the bottom half of the stone. This angle works because it creates total internal reflection for most gem materials we commonly cut.
This isn't arbitrary. The 42-degree angle represents decades of research and testing. Early pioneers like Long and Steele conducted extensive calculations to find optimal light return. Their work, combined with modern computer ray tracing, confirmed that 42 degrees maximizes brilliance for the vast majority of gems.
Why 42 degrees works so well:
- It maximizes internal reflection for gems with refractive indexes between 1.6 and 2.0
- Light entering through the crown bounces off pavilion facets back to the viewer
- The angle prevents light from escaping through the bottom (called "light leakage")
- It creates the brightest possible appearance in finished gems
- Most colored gemstones fall within the refractive index range where 42 degrees excels
The exceptions are few but important. Gems with very low refractive indexes (around 1.55, like quartz and iolite) work better at 43 degrees to minimize windowing effects. Meanwhile, extremely high refractive index materials (approaching diamond's range) can sometimes benefit from slightly shallower angles around 41 degrees, though the difference becomes negligible until you reach truly extreme refractive indexes.
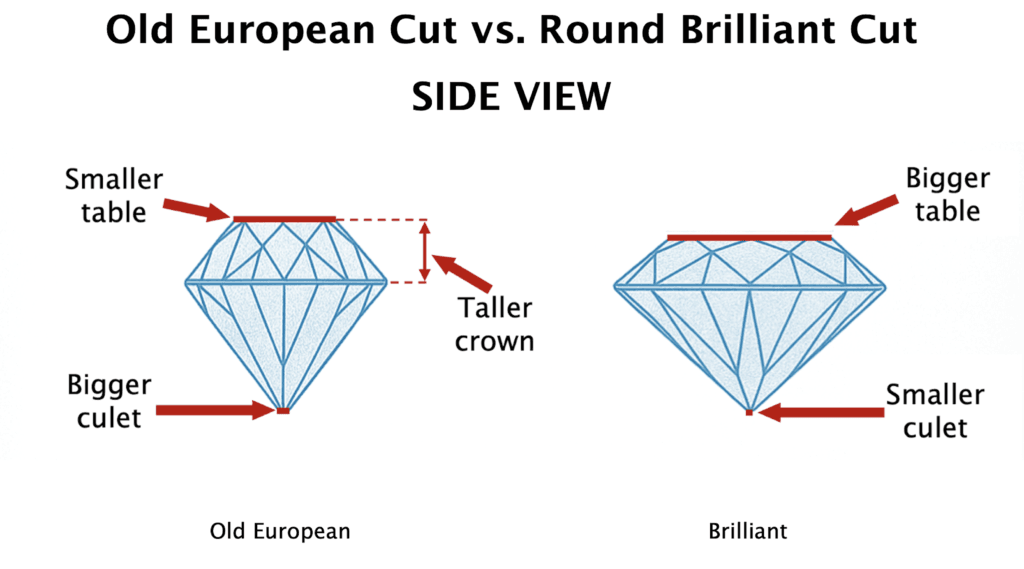
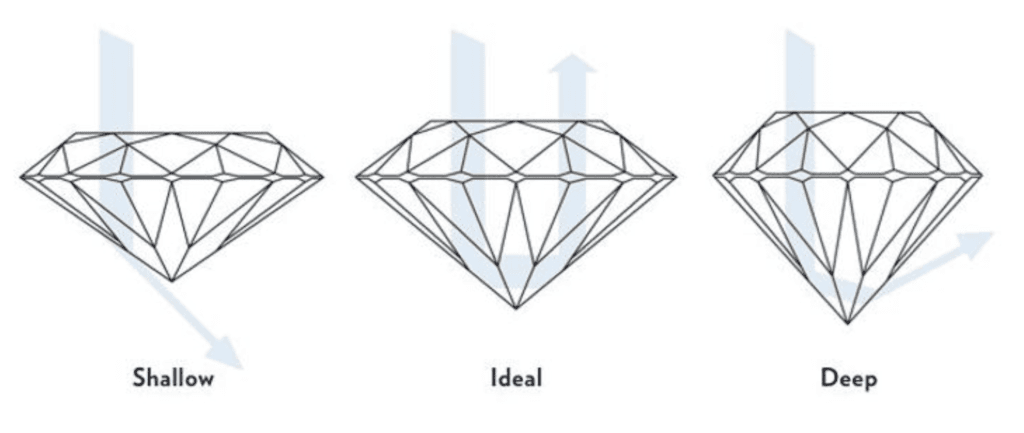
The Crown Revolution: Shallow is Better
For decades, gem cutters followed traditional wisdom that called for crown angles of 42 degrees or higher. This seemed logical—higher crowns appeared more substantial and impressive. Then computer ray tracing technology changed everything in the most surprising way possible.
Scientists discovered that much shallower crown angles—as low as 25 degrees—actually produce more brilliance than the traditional high crowns. This discovery completely revolutionized modern gem cutting. The research showed that most gems achieve maximum brilliance with crown main angles of just 25 degrees when viewed face-up.
This finding shocked the gem cutting world because it directly contradicted generations of accepted practice. Traditional books on faceting suddenly needed updates. The old masters weren't wrong about craftsmanship, but they lacked the computer tools to test every possible angle combination.
However, there's a crucial catch to this shallow crown discovery. In the real world, we rarely view gems directly face-up. We see them from various angles as they move on fingers, in earrings, or on necklaces. Very shallow crowns can cause "windowing"—the effect of seeing right through the stone when viewed at slight angles. This problem becomes more pronounced with lower refractive index gems.
The modern compromise: Most expert cutters now use crown angles around 36-38 degrees. This represents the sweet spot—much more brilliant than old-style high crowns, but not so shallow as to cause windowing problems in normal viewing conditions.
Jerry Wykoff, President of the American Society of Gemcutters, recommends pavilion mains of 42 degrees and crown mains of 36 degrees for all gems as an excellent overall compromise. This combination works across a wide range of materials and viewing conditions.
Special Considerations for Different Gems
Not all gems behave the same way. Gems with refractive indexes between 1.7 and 1.8—primarily garnets and corundum (sapphires and rubies)—face a unique challenge called extinction. This occurs when light reflects off the inside of crown facets and back into the gem instead of escaping to the viewer's eye. Where light doesn't escape, you see black areas from the top.
For these materials, crown angles of 25 degrees can actually minimize extinction effects. However, cutters must balance this against practical considerations like yield from rough material and the gem's intended use.
Highly dispersive gems (those that split light into strong rainbow colors) require different treatment entirely. For maximum fire and dispersion, higher crown angles around 45 degrees work better, combined with larger star facets. This shows how cutting goals—brilliance versus dispersion—can require opposite approaches.
What Happens When Angles Go Wrong
Precision matters because seemingly small changes create dramatically different results. The margin for error is surprisingly narrow. Consider a topaz with its critical angle around 37 degrees:
Perfect cut (39-42 degrees): Achieves full internal reflection, showing vibrant color flashes and maximum sparkle. Light enters, bounces around efficiently, and returns to the viewer's eye.
Too steep (50 degrees): Light leaks out through the pavilion instead of reflecting back. This creates a dark, almost black center that kills the stone's brilliance. The gem appears lifeless despite being the same material.
Too shallow (35 degrees): Creates the dreaded "fish eye" effect with a visible halo around a see-through center. The stone looks like it has a window in the middle, completely destroying its beauty.
The difference between stunning and disappointing often comes down to just a few degrees. This is why precision tools and careful measurement are essential for professional results. A protractor error of even 2-3 degrees can mean the difference between a gem that stops people in their tracks and one that gets ignored.
Examples of Good vs. Poor Facet Symmetry and Polish
What Perfect Symmetry Looks Like
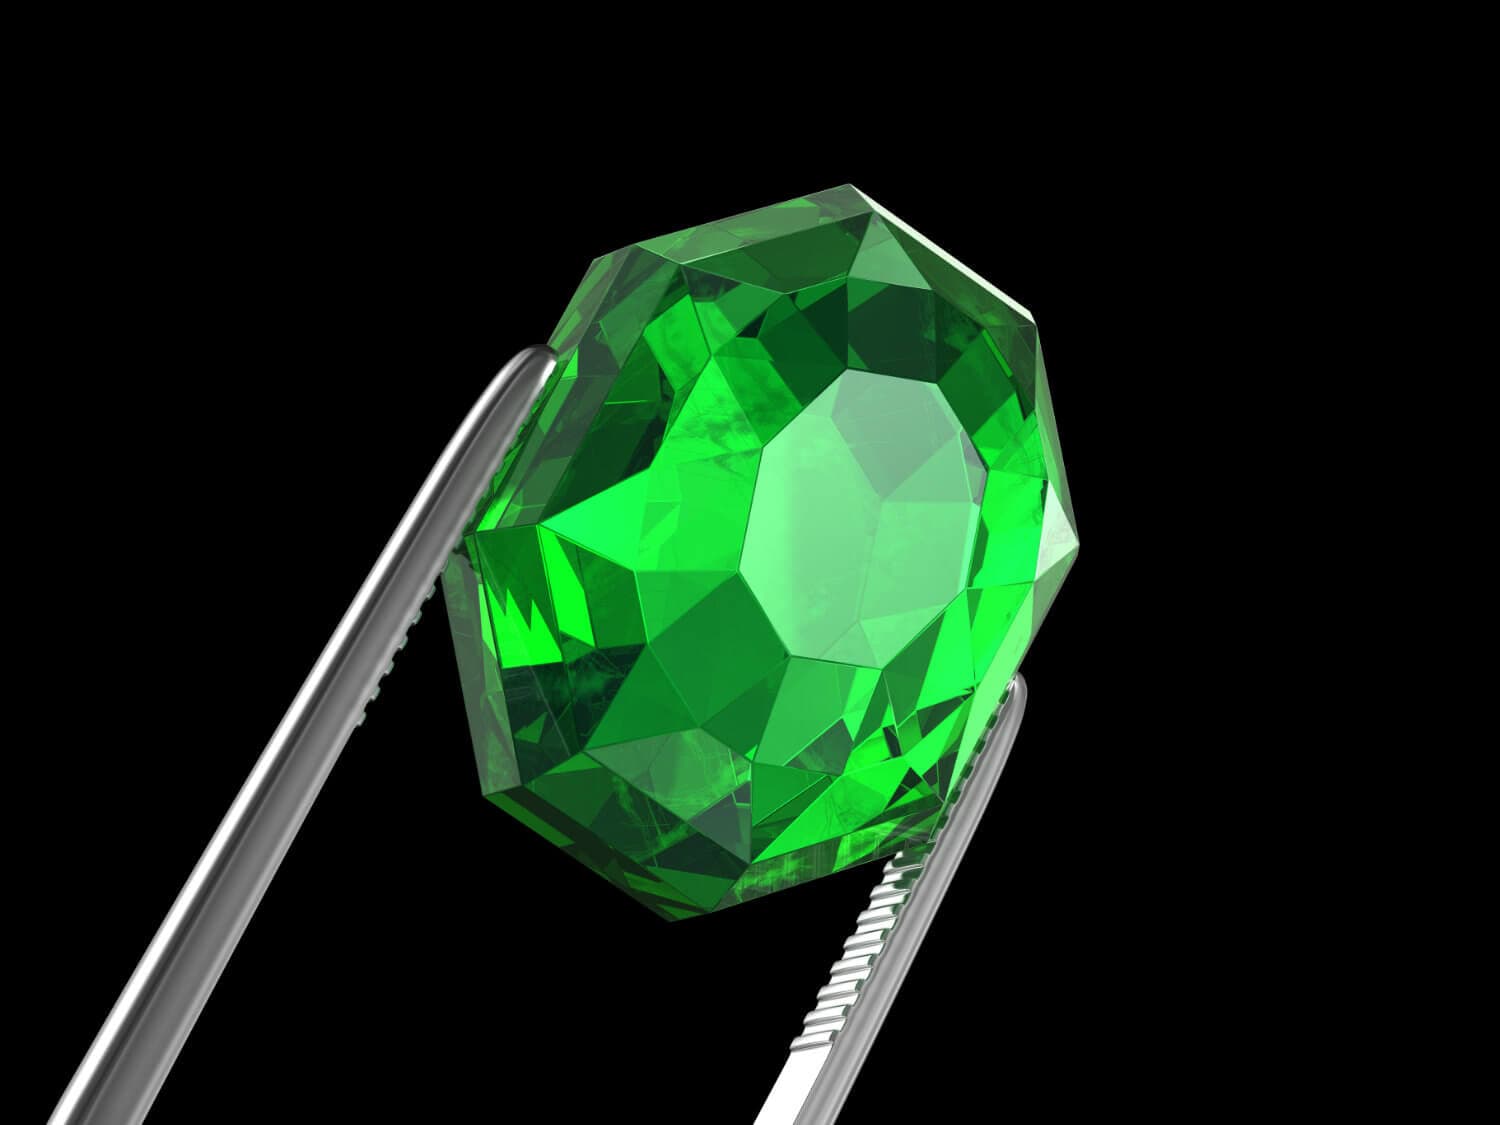
Excellent symmetry represents the pinnacle of the faceter's art. Every facet must be precisely shaped, evenly sized, and perfectly aligned with mathematical precision. This isn't just about appearance—symmetry directly affects optical performance. When facets are perfectly symmetrical, light behaves predictably, creating the even patterns of brilliance that separate fine gems from mediocre ones.
In a well-cut round diamond, you can see this symmetry under magnification as perfect "hearts and arrows" patterns. These patterns aren't decorative—they're proof of optical precision. The hearts appear when viewing the diamond from the pavilion side, while arrows show from the crown side. Both patterns must be perfectly uniform and centered to indicate ideal cutting.
Signs of superior symmetry:
- All facets meet at sharp, crisp points with no rounded edges
- The table (top flat surface) sits perfectly centered over the girdle
- Facet edges form clean, straight lines that appear laser-precise
- Light patterns appear balanced and uniform across the entire stone
- Crown and pavilion facets align perfectly when viewed from the side
- The girdle shows consistent thickness all around the stone
When symmetry is perfect, light reflects evenly across the stone's surface. Each facet works in harmony with its neighbors, creating a symphony of light rather than a chaotic display. This coordination is what transforms good cutting into great cutting.
The girdle—the narrow band around the stone's widest part—plays a crucial role in symmetry. A perfectly cut girdle appears as a smooth, even circle (or the appropriate shape for fancy cuts). Any waves, flat spots, or thickness variations immediately signal symmetry problems that will affect the stone's performance.
The Polish Factor: Mirror Perfection
Polish quality affects how cleanly light passes through facet surfaces. Think of each facet as a tiny mirror. Perfect polish creates surfaces so smooth they approach the molecular level, allowing undistorted light transmission and perfect reflections. Poor polish scatters light in random directions, reducing brightness and creating a hazy appearance.
The polishing process removes microscopic scratches left by cutting wheels. Expert polishers use progressively finer abrasives, working down to polishing compounds measured in fractions of microns. The final step produces surfaces that can reflect light with no distortion whatsoever.
Excellent polish produces:
- Crisp, sharp reflections that look like mirrors
- Maximum light return with no scattered rays
- Clean, bright appearance with exceptional clarity
- No visible scratches, pits, or rough spots under 10x magnification
- Facet surfaces that appear to glow with inner light
- Reflections so sharp you can read text in them
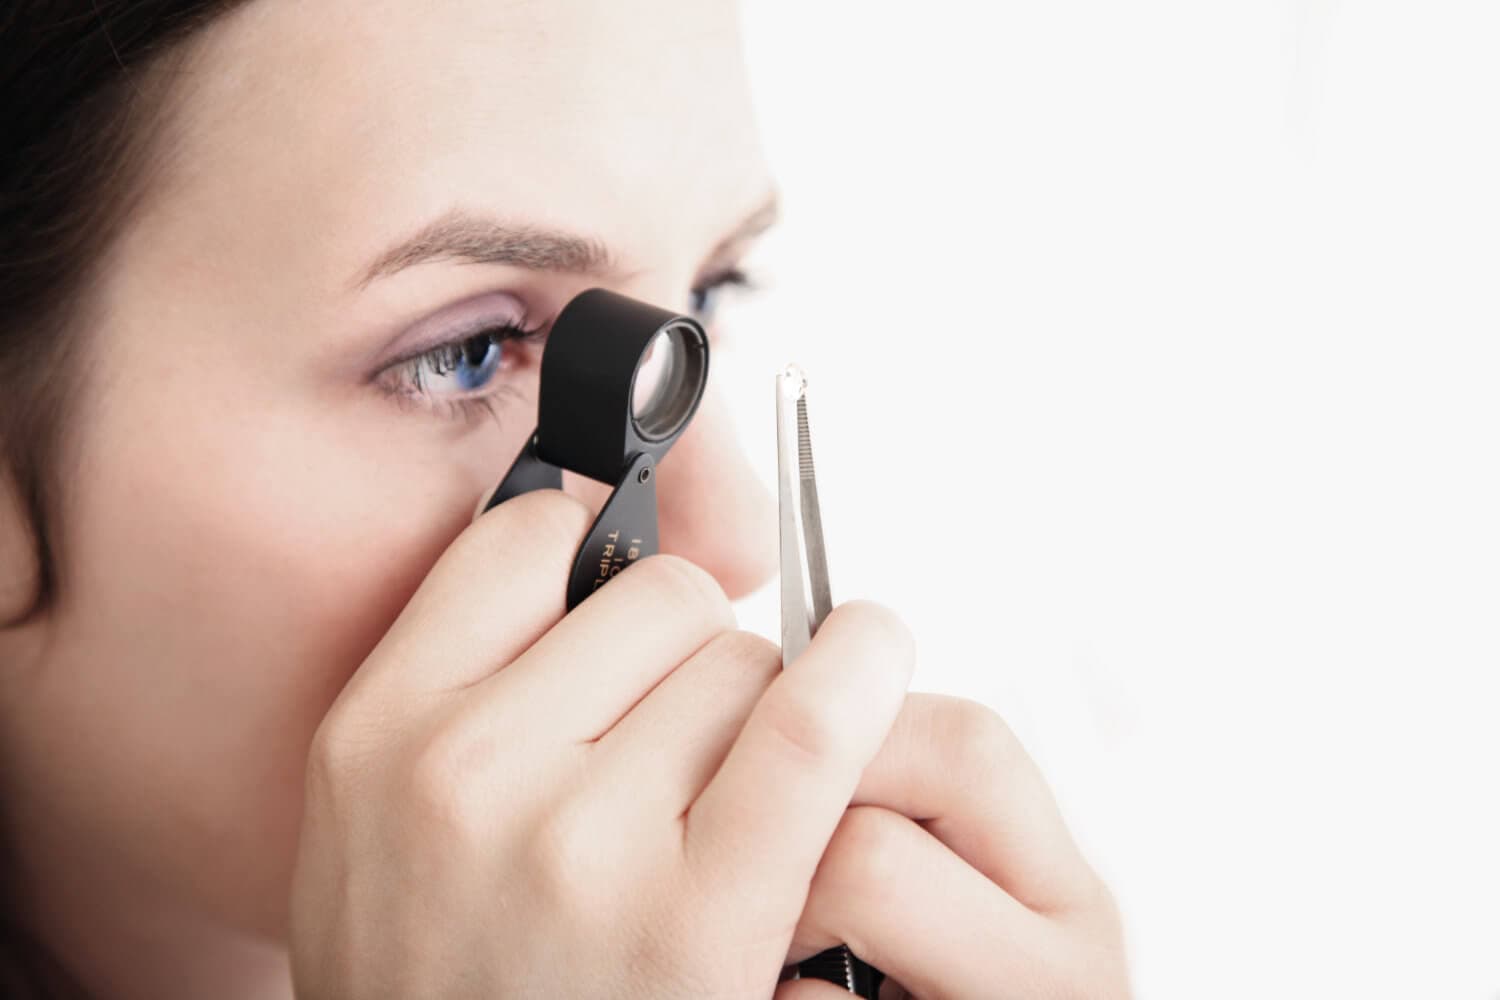
Professional gem graders examine polish under 10x magnification, looking for even the tiniest imperfections. At the highest grades, facet surfaces should appear flawless, with reflections so sharp they seem to have depth.

When Things Go Wrong: The Anatomy of Poor Cutting
Poor symmetry and polish problems are often visible even to untrained eyes, though understanding what you're seeing helps identify specific issues. These problems don't just affect appearance—they fundamentally alter how light behaves in the stone.
Symmetry defects and their effects:
- Off-center tables that throw off light patterns and create uneven brilliance
- Wavy girdles that look amateur and disrupt the stone's profile
- Misaligned facets that don't meet properly, creating light leakage
- Extra or missing facets that completely disrupt designed light paths
- Uneven facet sizes that create patchy brilliance patterns
- Tilted tables that make stones appear lopsided even when properly set
Polish problems and their consequences:
- Scratched surfaces that scatter light and reduce brightness
- Pits or rough spots that create permanent dull areas
- Hazy appearance that makes stones look cloudy or old
- Uneven polish across different facets, creating inconsistent reflections
- Burn marks from excessive heat during polishing
- Orange peel texture that distorts reflections

Understanding Light Patterns in Cut Gems
Well-cut gems display characteristic light patterns that change predictably as you move them. These patterns result from the precise interaction between facet angles, symmetry, and polish. Learning to read these patterns helps you evaluate cutting quality instantly.
In brilliant cuts: Look for alternating bright and dark triangular areas that radiate from the center. These should be evenly spaced and shift smoothly as you tilt the stone. Irregular patterns indicate symmetry problems.
In step cuts: Expect parallel bands of light and dark that run the length of the stone. These bands should be evenly spaced and uniform in width. Wavy or irregular bands suggest angle problems.
In mixed cuts: Combinations of brilliant and step cutting create more complex patterns, but the same principles apply—uniformity and predictable behavior indicate quality cutting.
Real-World Examples: The Good, Bad, and Ugly
The brilliant performer: A well-cut Ceylon sapphire with 42-degree pavilion mains and 38-degree crown angles demonstrates what precision can achieve. The stone shows intense color saturation throughout, with bright sparkle visible even in modest lighting. Every facet contributes to the overall effect. When moved, light patterns shift smoothly across the surface. The girdle appears perfectly round, and facet junctions are crisp and sharp. This stone commands attention and holds it.
The disappointing stone: Take the same sapphire material and cut it with poor symmetry. The result shows uneven color distribution, with some areas appearing darker or lighter than others. Sparkle concentrates in certain spots while other areas remain dull. Light leaks out instead of returning to the viewer, creating an overall flat appearance. Dark zones appear where light gets trapped by misaligned facets. Despite being the same valuable material, this stone fails to impress.
The "windowing" disaster: A shallow-cut ruby where cutting angles were miscalculated shows the dreaded window effect. When viewed at slight angles, you can see right through the center of the stone to whatever lies behind it. The stone lacks the optical density that proper angles would provide. Instead of the rich red glow expected from fine ruby, you get a pale, transparent disappointment.
The polish nightmare: A ruby with excellent cutting angles but poor polish demonstrates how surface quality affects everything. Despite correct angles, the stone appears hazy and dull. Reflections look soft and unfocused. The surface shows tiny scratches under magnification, and some facets appear duller than others. The overall effect is of a stone that looks older and less valuable than it actually is.

How to Spot Quality Differences
Even without expert training, you can recognize quality differences by knowing what to look for. These techniques work in jewelry stores, at gem shows, or when evaluating your own collection.
Examine light patterns: Quality gems show balanced areas of light and dark that shift smoothly as you move the stone. Poor cutting creates irregular patterns with dead spots or overly bright areas.
Check facet junctions: Use a loupe or magnifying glass to examine where facets meet. Well-cut gems have crisp edges that look like they were drawn with a ruler. Poor cutting shows rounded or fuzzy junction lines.
Test for consistent sparkle: Premium cutting produces sparkle across the entire stone, not just certain areas. Tilt the gem slowly and watch how light moves across the surface.
Evaluate reflections: Look at reflections in the facet surfaces. Sharp, clear reflections indicate excellent polish. Hazy or distorted reflections suggest polish problems.
Notice color distribution: In colored gems, excellent cutting shows even color saturation throughout the stone. Poor cutting creates windows (pale areas) or extinction zones (dark areas) that reduce beauty and value.
Assess overall symmetry: Step back and look at the overall shape. Quality cutting produces gems that look balanced and proportional from all angles. Poor symmetry is often visible as an "off" appearance that's hard to define but easy to see.
Summary
Precision in gem faceting represents the difference between ordinary stones and extraordinary ones. The transformation from rough crystal to brilliant gem depends entirely on the cutter's ability to calculate, measure, and execute with mathematical precision. Every angle matters, every facet must align perfectly, and every surface must achieve mirror perfection.
The science behind brilliant gems is both complex and elegant. Light follows predictable laws, but only precise cutting can harness those laws to create optical magic. The discovery that shallow crowns increase brilliance revolutionized the industry, proving that even centuries-old traditions can be improved through scientific understanding.
Modern gem cutting combines traditional craftsmanship with computer-aided design and measurement tools. Ray tracing programs can test thousands of angle combinations, but the human hand must still execute the cutting with precision measured in fractions of degrees. This marriage of technology and skill produces results that neither could achieve alone.
The difference between exceptional and mediocre cutting often comes down to details invisible to casual observation. A few degrees of angle variation, slight misalignments in symmetry, or microscopic polish imperfections can completely change a gem's optical performance. This is why true precision commands premium prices—the difference in effort between good and great cutting is enormous.
Understanding precision helps you appreciate the incredible skill required to create truly brilliant gems. When you see a stone that seems to glow with inner fire, you're witnessing the result of countless precise calculations and expert execution. Every flash of light represents a triumph of human skill over the raw forces of nature.
Key takeaways:
- Pavilion angle is absolutely critical—42 degrees works for almost all colored gems, with 43 degrees for low refractive index stones
- Shallow crown angles (36-38 degrees) maximize brilliance while avoiding windowing problems in normal viewing
- Perfect symmetry ensures even light performance across the entire stone with no dark zones or light leakage
- Mirror-like polish allows maximum light transmission and return, creating sharp reflections and brilliant sparkle
- Even small precision errors—just 2-3 degrees—can dramatically reduce a gem's optical performance and value
- Computer ray tracing revolutionized cutting by proving shallow crowns increase brilliance, contradicting centuries of tradition
- Different gems require different approaches—garnets and corundum need special consideration for extinction effects
- Quality cutting produces predictable, uniform light patterns that shift smoothly as the stone moves
The next time you see a truly brilliant gem, you'll understand the incredible precision that went into creating that moment of optical magic. Every flash of light represents countless careful calculations, precise measurements, and expert craftsmanship—the marriage of art, science, and skill that transforms ordinary crystal into captured starlight. This is why precision in faceting isn't just important—it's everything.


Never Stop Learning
When you join the IGS community, you get trusted diamond & gemstone information when you need it.