

This beginner's bead bracelet project is a great way to learn how to string beads with wire. Follow these hints and step-by-step instructions.
3 Minute Read
This is a neat, simple project that will teach you how to string beads with wire. You can take these skills and create bracelets, necklaces, earrings, etc. With different types and sizes of beads, you can create many different looks. Don't be afraid to experiment a bit. It's how we all learn a lot of things, by trial and error. You may, however, want to make that "error" with a cheaper wire!
Enjoy the project and wear it with pride!
Before picking up your tools and cutting any wire, please read these instructions carefully and completely to make sure you understand them.
Approximate cost of materials: $12.00, using gold-filled wire. (IGS editor's note: this is based on 1999 costs).
To make loops of the same size, mark your pliers with masking tape.
Before you cut the 11 pieces of wire into the 1¼" size, work one piece to completion. This will establish whether your loop is the same size as the one in the project. If you prefer a larger loop, cut your pieces longer.
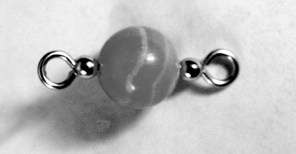
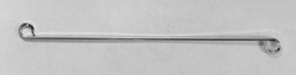
Your first step is to read the Helpful Hints! Then cut 11, 1¼" (or whatever size is right for you) pieces of 21 round hard. Take one piece and, with your round-nose pliers, make a loop at one end.
Now, with your round-nose pliers still in the loop, bend the loop backwards slightly so that it is now centered.
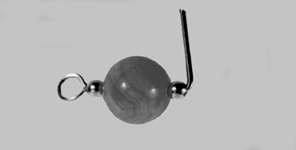
Thread on the bead of your choice.

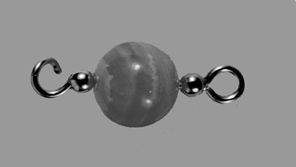
Bend the wire at the top of the beads over at a right angle and cut off about ⅜" from the bead.
Now, with your round-nose pliers, begin to curl the wire in.
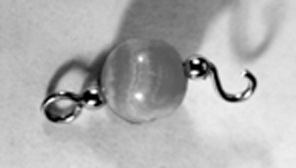
Continue to curl it into a loop until it meets and forms a circle.
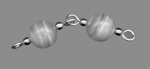
Repeat Steps 1 to 6 until you have used up all 11 pieces of the wire you prepared. All of your bead links are now done. To join them together, take your flat-nose pliers and open up one of the loops sideways.
Link another loop onto it.
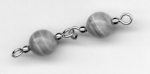
Close again sideways with your flat-nose pliers.
Repeat Step 7 to link all the beads together.
Make two S-hooks to go on either end of the bracelet.
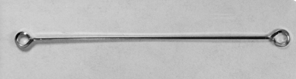
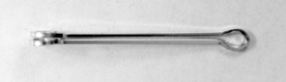
Cut a 2½" length of 22 square hard wire. With your round-nose pliers, make a loop at each end of the wire as shown below.
With your round-nose pliers still in the loop, pull back slightly to center the loop. Do both loops.
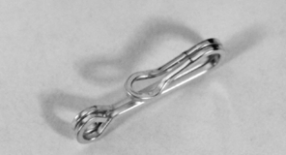
With your round-nose pliers, hold the wire in the center and slowly bring it around so you have a U-bend and the two loops meet evenly.
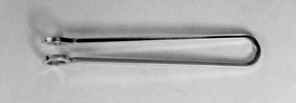
Hold the U-bend with your flat-nose pliers about ⅛" from the end and gently squeeze together.
Using your flat-nose pliers, bend the loop on the tip up on an angle.
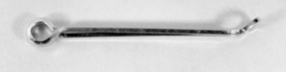
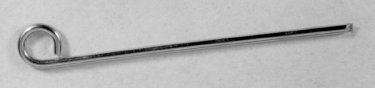
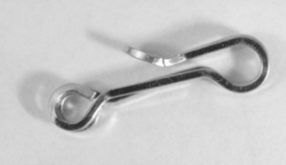
Place your round-nose pliers about ⅝" from the end (where the marks are in the picture below).

Bend it around as shown in the two illustrations below.
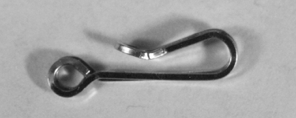
With the pliers still in the hook, move them to the back of the loop and bend backwards, as shown here.
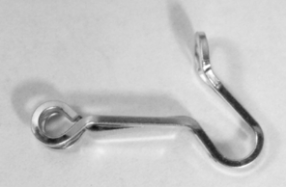
Then, bend forward again.
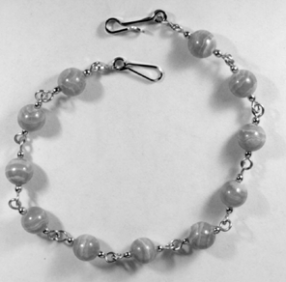
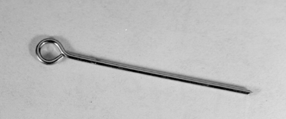
Attach this hook to your bracelet by opening your S-hooks sideways and closing them again. Use the eye described in February's beginner's section for the other end of your bracelet. You're done! You should now have something that resembles the illustration below.
This beginner's project was published in the March 1999 issue of Wired. All designs and images in this article are © 1999 by the Wire Artists Group. All rights reserved. Any unauthorized use, reproduction, or transfer of its content, in any medium, is strictly prohibited.


When you join the IGS community, you get trusted diamond & gemstone information when you need it.
This is a neat, simple project that will teach you how to string beads with wire. You can take these skills and create bracelets, necklaces, earrings, etc. With different types and sizes of beads, you can create many different looks. Don't be afraid to experiment a bit. It's how we all learn a lot of things, by trial and error. You may, however, want to make that "error" with a cheaper wire!
Enjoy the project and wear it with pride!
Before picking up your tools and cutting any wire, please read these instructions carefully and completely to make sure you understand them.
Approximate cost of materials: $12.00, using gold-filled wire. (IGS editor's note: this is based on 1999 costs).
To make loops of the same size, mark your pliers with masking tape.
Before you cut the 11 pieces of wire into the 1¼" size, work one piece to completion. This will establish whether your loop is the same size as the one in the project. If you prefer a larger loop, cut your pieces longer.
Your first step is to read the Helpful Hints! Then cut 11, 1¼" (or whatever size is right for you) pieces of 21 round hard. Take one piece and, with your round-nose pliers, make a loop at one end.
Now, with your round-nose pliers still in the loop, bend the loop backwards slightly so that it is now centered.
Thread on the bead of your choice.
Bend the wire at the top of the beads over at a right angle and cut off about ⅜" from the bead.
Now, with your round-nose pliers, begin to curl the wire in.
Continue to curl it into a loop until it meets and forms a circle.
Repeat Steps 1 to 6 until you have used up all 11 pieces of the wire you prepared. All of your bead links are now done. To join them together, take your flat-nose pliers and open up one of the loops sideways.
Link another loop onto it.
Close again sideways with your flat-nose pliers.
Repeat Step 7 to link all the beads together.
Make two S-hooks to go on either end of the bracelet.
Cut a 2½" length of 22 square hard wire. With your round-nose pliers, make a loop at each end of the wire as shown below.
With your round-nose pliers still in the loop, pull back slightly to center the loop. Do both loops.
With your round-nose pliers, hold the wire in the center and slowly bring it around so you have a U-bend and the two loops meet evenly.
Hold the U-bend with your flat-nose pliers about ⅛" from the end and gently squeeze together.
Using your flat-nose pliers, bend the loop on the tip up on an angle.
Place your round-nose pliers about ⅝" from the end (where the marks are in the picture below).
Bend it around as shown in the two illustrations below.
With the pliers still in the hook, move them to the back of the loop and bend backwards, as shown here.
Then, bend forward again.
Attach this hook to your bracelet by opening your S-hooks sideways and closing them again. Use the eye described in February's beginner's section for the other end of your bracelet. You're done! You should now have something that resembles the illustration below.
This beginner's project was published in the March 1999 issue of Wired. All designs and images in this article are © 1999 by the Wire Artists Group. All rights reserved. Any unauthorized use, reproduction, or transfer of its content, in any medium, is strictly prohibited.


