

A multipurpose microscope stage can help you move, view, and photograph gemstones under magnification easily from many angles. Learn how you can build one.
4 Minute Read
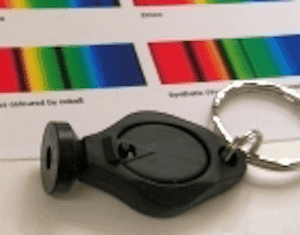
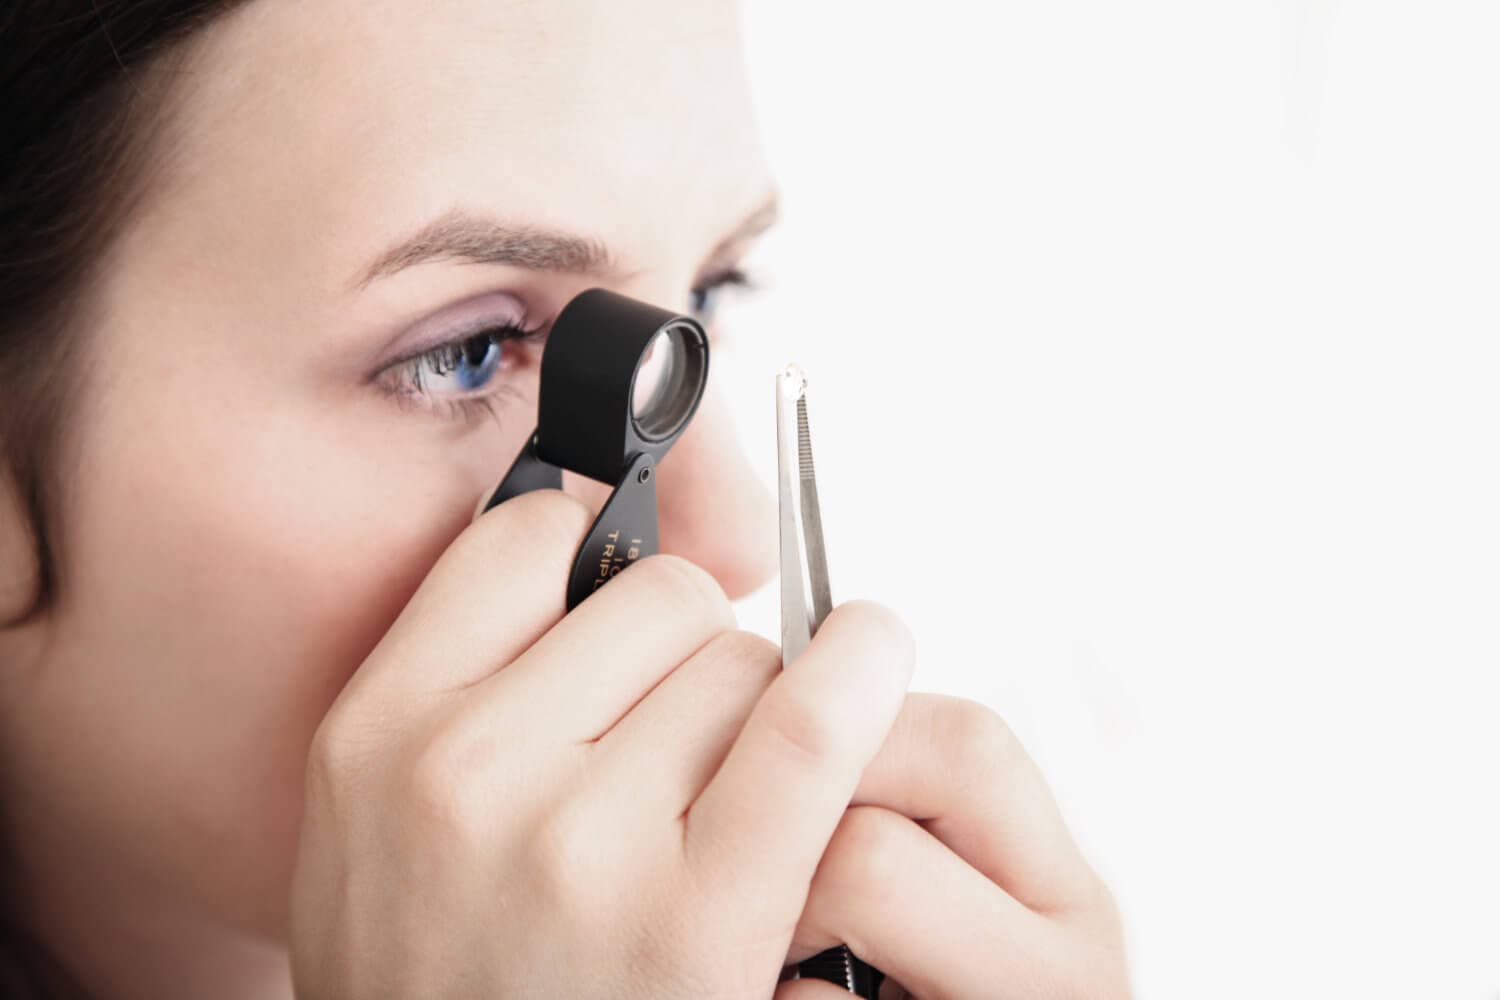
When observing gemstones through a microscope, we gemologists normally use gemological tweezers or a stone holder. We can attach these tweezers to the microscope itself or to an external support.
It's important to use tweezers instead of fingers to keep dirt, oil, and fingerprints off the gem. Unfortunately, the tweezers also make minor movements and adjustments to viewing angles difficult or limited. Since gemologists have to move the tweezers by hand under magnification, the images jump abruptly. Furthermore, the small button of the tweezers doesn't allow for soft movements, which makes rotating the gem no easy task.
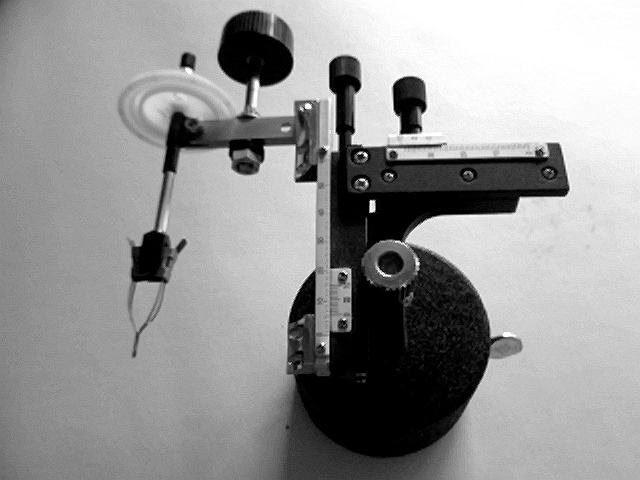
To address this problem, I've created a multipurpose microscope stage for gems that you can build yourself. You can see the finished instrument in Figure 1 at the top of this article. The video below shows how the stage moves and works.
To build this, you will need
You can find the counterweight and the focusing pinion at a telescope shop or a scrapyard. You can also scrounge these parts from an old telescope. The counterweight I used had a 1.3 kg (2.86 pounds) weight.
Let's talk about the microscope stage. These devices can cost you thousands of dollars, depending on their quality. Some very sturdy models have several degrees of liberty. You can move the piece up and down, left to right, closer or farther away. Plus, you can make all these movements with fast and slow motion knobs. However, you don't need any of this. Just buy a simple, inexpensive stage like the one in Figure 2. (This one cost me $25 on eBay).
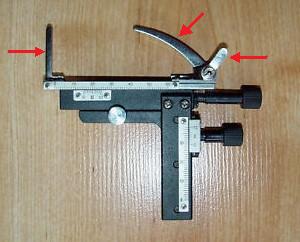
This model has two possible movements: forward and back, left to right. This tool is made of metal, with the exception of the plastic knobs and the interior gear stripe. Since the gear stripe is plastic, use care when operating and don't force the mechanism.
First, remove the pieces marked with the arrows in Figure 2. (You can store them away for future use). Remove the left piece but keep its base and put the screws back in place. Next, remove the two pieces on the right side. They have a small spring. Put all this aside but keep the main screw, because you'll need it later.
Remember to remove just the indicated pieces.
Put the small screws back to their places.
Tighten up all the screws of the stage.
Now, get the telescope focusing device. See Figure 3.
To prepare this device, remove one of the knobs. Do this by either cutting or heating the metal. If you use heat, remember to do it carefully, because you'll need at least one of these plastic knobs. I prefer heating to cutting, in order to retain a longer rod. Leave the gear in place or move it slightly (approximately 1-2 mm) from the remaining button.

Now, prepare the tweezers. Figure 4 shows you how to do this.
The great gear is a large plastic gear recovered from scrap. It will interact with that small gear that you have in the prepared focusing device (Figure 3). So, find a large one with five or six times more gear teeth than the small one. I used a 6:1 ratio for my device. This means my large gear has 96 teeth and the small gear has 16. Thus, to use these two gears, I have to turn the knob 6 times to obtain 1 complete turn of the great gear (a slow motion).
Try to assemble the pieces before any drill or cut. When you're sure about the dimensions and placement, cut a piece of an old antenna, or any other tube you prefer. Next, insert it in the tweezers. This will function as a stopper. Insert the great gear and measure where you'll drill a passage for a small screw. Ensure that the small screw can firmly secure the great gear.
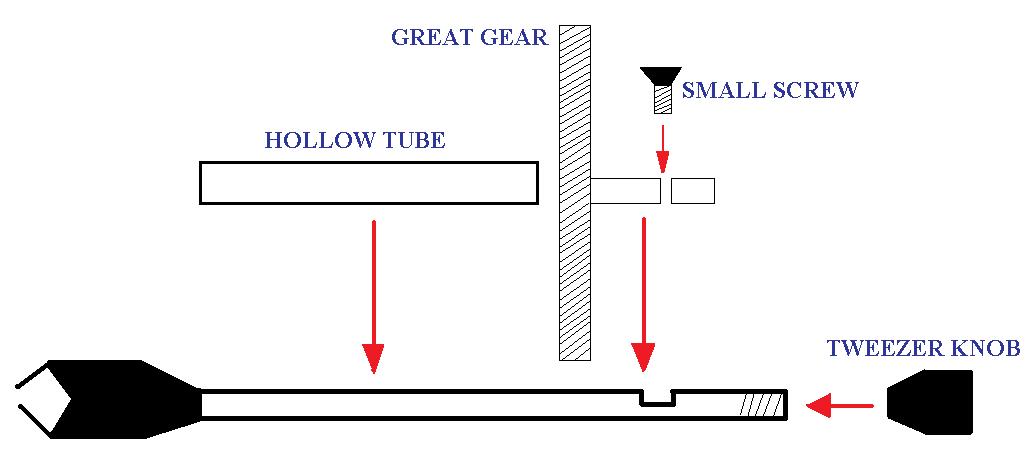
Now, to finish this part of the job, use a metal U-shaped form to join the parts. The focusing knob will pass through a hole, in a way that the two gears can interact together. Use another small tube to convey the axis of the focusing knob, make a screw thread in the free end, and close it with a screw-nut.
Also, use a small spring and a receiver to stabilize the system. To secure this part to the stage, use the original main screw that you removed and saved.
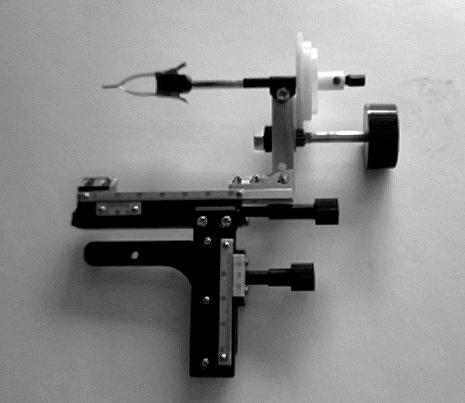
Figure 5 shows the completed stage.
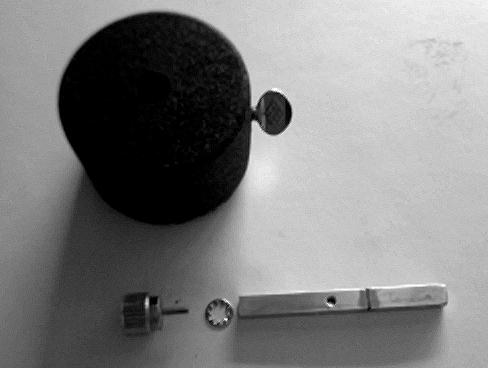
The last thing you'll need to make is the supporting base. (See Figure 6). This step is quite simple.
First, make a threaded hole on the top. Cut the rod according to your needs. Remember that the length will depend on the height of your microscope. Do the cut so that when the rod is inserted in the telescope counterweight, you can pull or push the rod to some extent. Also, use a good screw attached to a plastic or metal button. With this screw, secure the stage to the top of the rod, insert the rod in the counterweight center hole, and complete the job by gluing the rubber legs on the bottom of the counterweight.
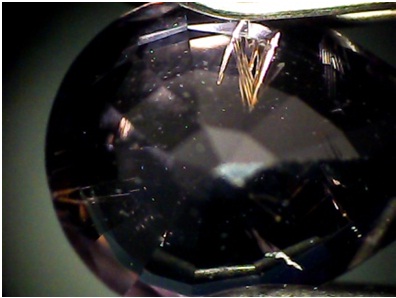
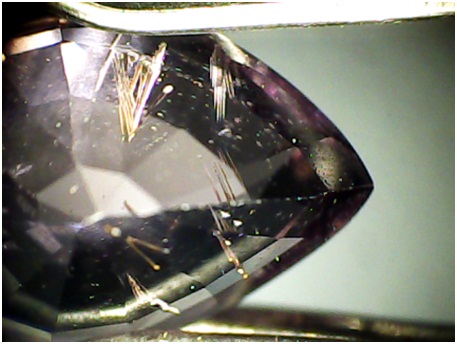
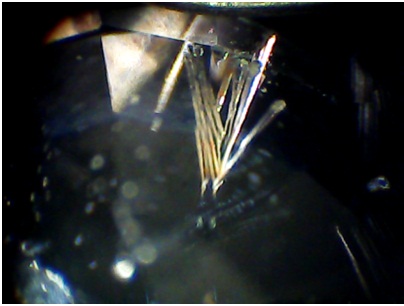
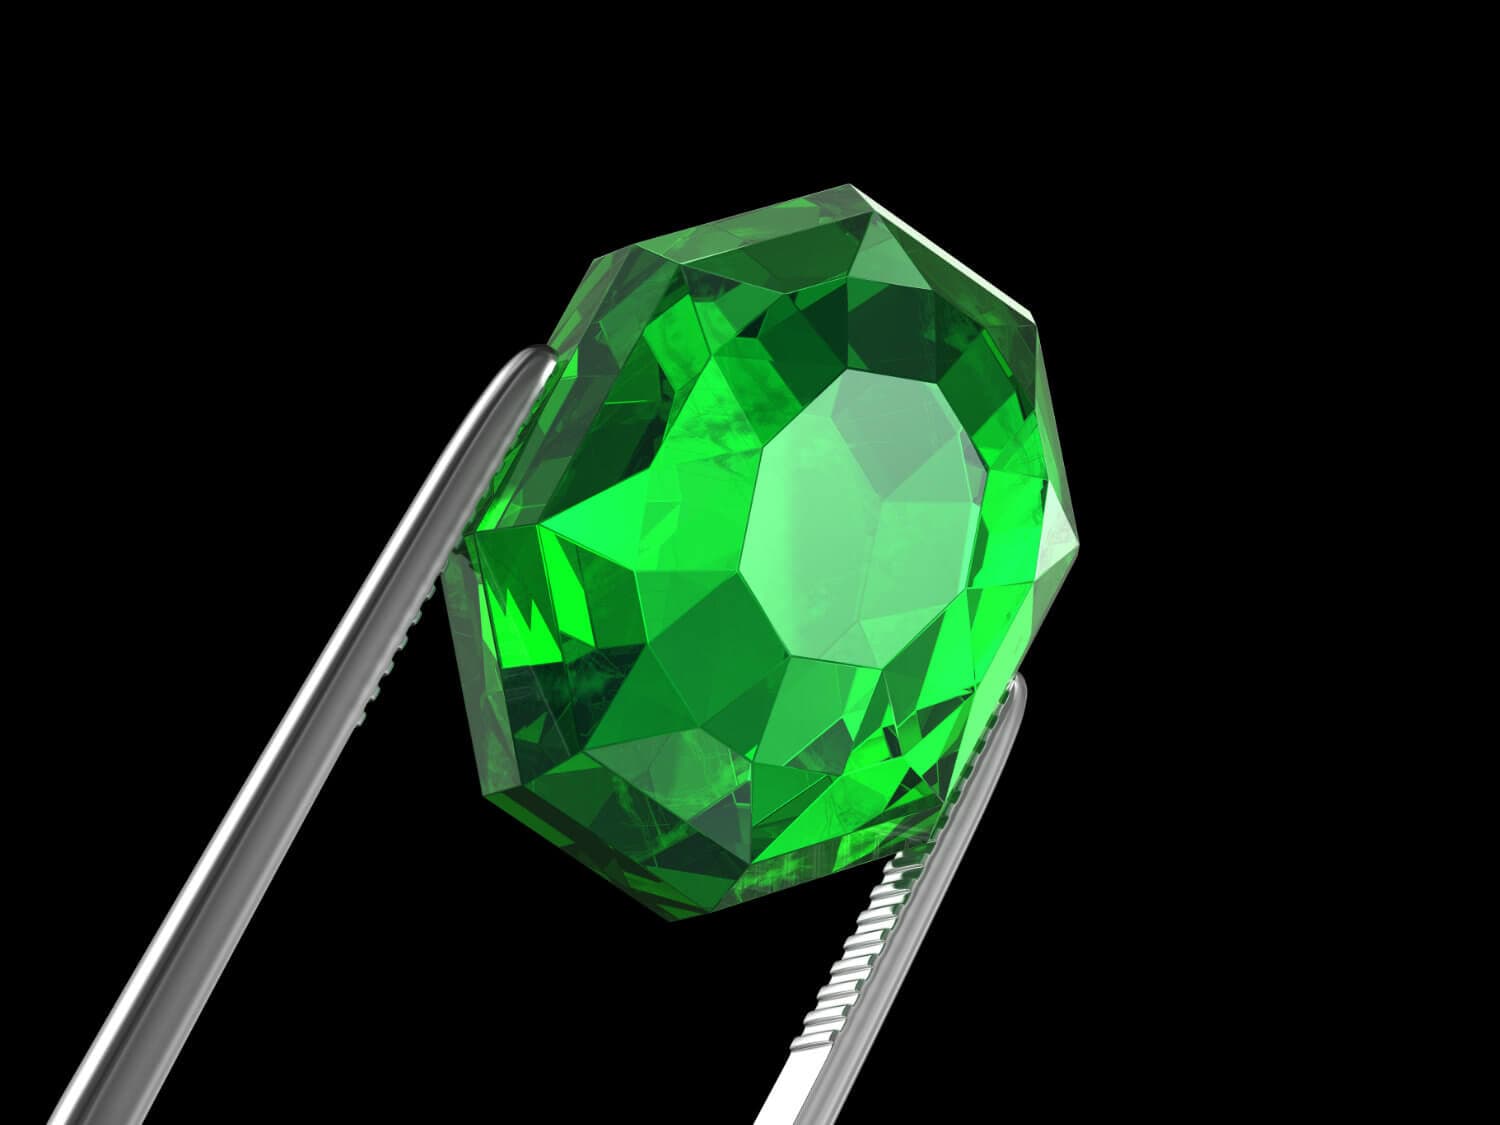
The following photos demonstrate how handy this device can be. Taking this series of photos required less than 30 seconds. Without our stage, this would have taken much more time.


When you join the IGS community, you get trusted diamond & gemstone information when you need it.
When observing gemstones through a microscope, we gemologists normally use gemological tweezers or a stone holder. We can attach these tweezers to the microscope itself or to an external support.
It's important to use tweezers instead of fingers to keep dirt, oil, and fingerprints off the gem. Unfortunately, the tweezers also make minor movements and adjustments to viewing angles difficult or limited. Since gemologists have to move the tweezers by hand under magnification, the images jump abruptly. Furthermore, the small button of the tweezers doesn't allow for soft movements, which makes rotating the gem no easy task.
To address this problem, I've created a multipurpose microscope stage for gems that you can build yourself. You can see the finished instrument in Figure 1 at the top of this article. The video below shows how the stage moves and works.
To build this, you will need
You can find the counterweight and the focusing pinion at a telescope shop or a scrapyard. You can also scrounge these parts from an old telescope. The counterweight I used had a 1.3 kg (2.86 pounds) weight.
Let's talk about the microscope stage. These devices can cost you thousands of dollars, depending on their quality. Some very sturdy models have several degrees of liberty. You can move the piece up and down, left to right, closer or farther away. Plus, you can make all these movements with fast and slow motion knobs. However, you don't need any of this. Just buy a simple, inexpensive stage like the one in Figure 2. (This one cost me $25 on eBay).
This model has two possible movements: forward and back, left to right. This tool is made of metal, with the exception of the plastic knobs and the interior gear stripe. Since the gear stripe is plastic, use care when operating and don't force the mechanism.
First, remove the pieces marked with the arrows in Figure 2. (You can store them away for future use). Remove the left piece but keep its base and put the screws back in place. Next, remove the two pieces on the right side. They have a small spring. Put all this aside but keep the main screw, because you'll need it later.
Remember to remove just the indicated pieces.
Put the small screws back to their places.
Tighten up all the screws of the stage.
Now, get the telescope focusing device. See Figure 3.
To prepare this device, remove one of the knobs. Do this by either cutting or heating the metal. If you use heat, remember to do it carefully, because you'll need at least one of these plastic knobs. I prefer heating to cutting, in order to retain a longer rod. Leave the gear in place or move it slightly (approximately 1-2 mm) from the remaining button.
Now, prepare the tweezers. Figure 4 shows you how to do this.
The great gear is a large plastic gear recovered from scrap. It will interact with that small gear that you have in the prepared focusing device (Figure 3). So, find a large one with five or six times more gear teeth than the small one. I used a 6:1 ratio for my device. This means my large gear has 96 teeth and the small gear has 16. Thus, to use these two gears, I have to turn the knob 6 times to obtain 1 complete turn of the great gear (a slow motion).
Try to assemble the pieces before any drill or cut. When you're sure about the dimensions and placement, cut a piece of an old antenna, or any other tube you prefer. Next, insert it in the tweezers. This will function as a stopper. Insert the great gear and measure where you'll drill a passage for a small screw. Ensure that the small screw can firmly secure the great gear.
Now, to finish this part of the job, use a metal U-shaped form to join the parts. The focusing knob will pass through a hole, in a way that the two gears can interact together. Use another small tube to convey the axis of the focusing knob, make a screw thread in the free end, and close it with a screw-nut.
Also, use a small spring and a receiver to stabilize the system. To secure this part to the stage, use the original main screw that you removed and saved.
Figure 5 shows the completed stage.
The last thing you'll need to make is the supporting base. (See Figure 6). This step is quite simple.
First, make a threaded hole on the top. Cut the rod according to your needs. Remember that the length will depend on the height of your microscope. Do the cut so that when the rod is inserted in the telescope counterweight, you can pull or push the rod to some extent. Also, use a good screw attached to a plastic or metal button. With this screw, secure the stage to the top of the rod, insert the rod in the counterweight center hole, and complete the job by gluing the rubber legs on the bottom of the counterweight.
The following photos demonstrate how handy this device can be. Taking this series of photos required less than 30 seconds. Without our stage, this would have taken much more time.


