

Recutting gems that have been poorly cut can increase their value significantly. See how precision custom cutting can transform a gem.
6 Minute Read
Gem cutters use the standard mixed cut for most all gem shapes. It consists of a step-cut bottom (pavilion) and a brilliant-cut top (crown). Step cutting is done using rectangular or square-shaped facets. Brilliant cutting is done using triangular, diamond, and/or kite-shaped facets.
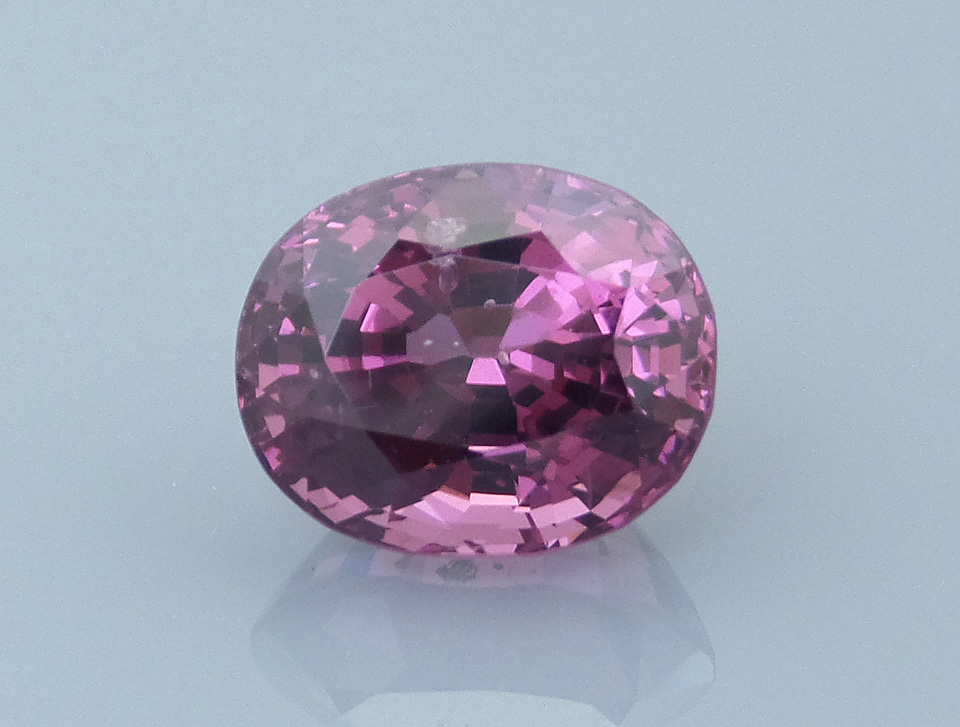
Look at the spinel in the photo above. It's a prime example of some great gem material poorly cut.
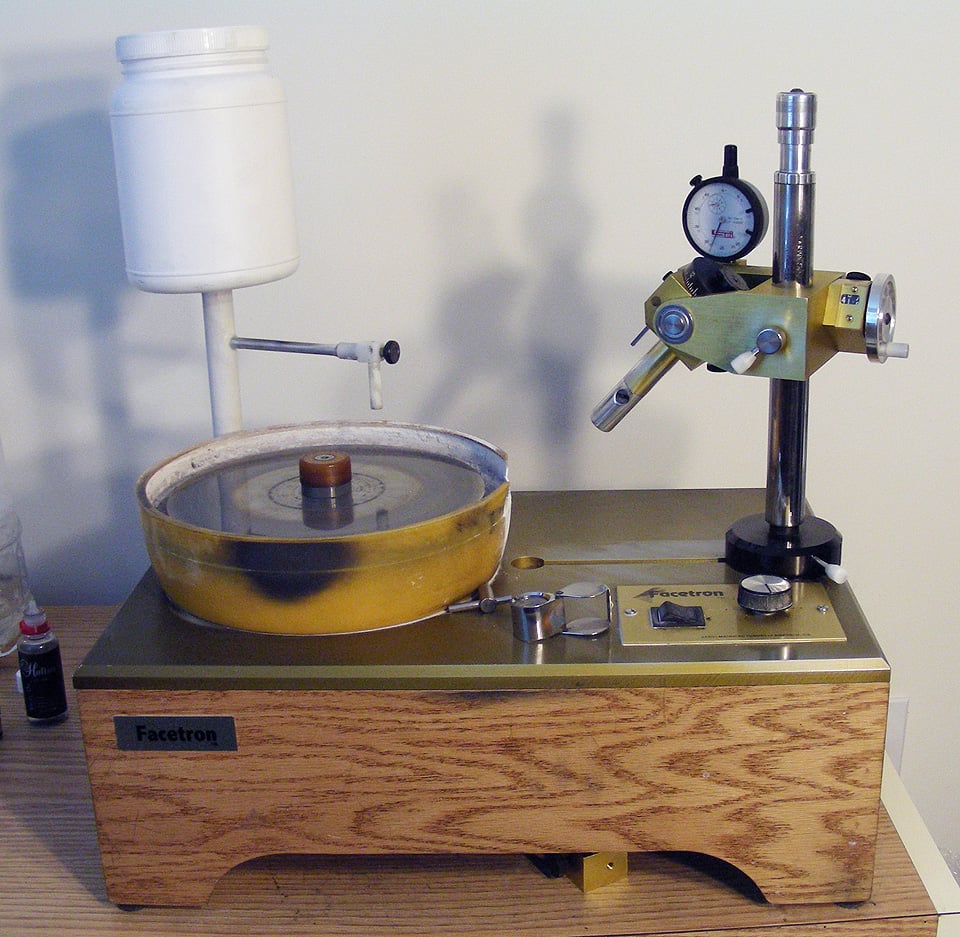
I'll recut this gem using a Facetron faceting machine, probably the most popular faceting machine for custom gem cutting. Look at the photo below as I describe its features.
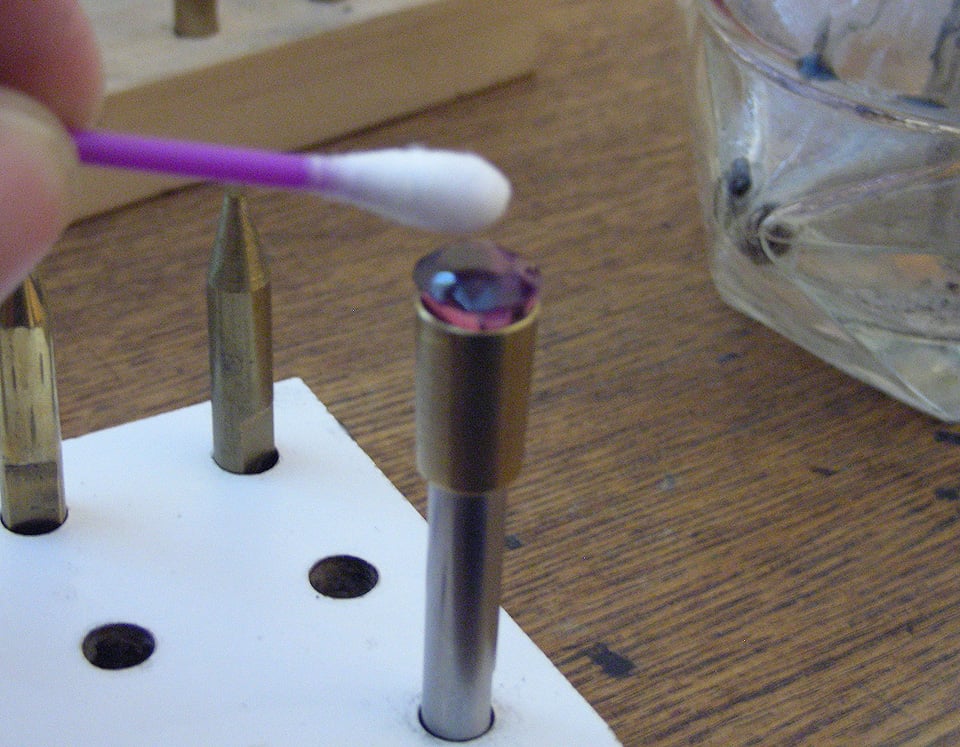
Before recutting gems, wipe them off with an alcohol swab. This will remove all traces of oil present on the surfaces.
Next, attach your stone to a flat-ended dop stick keyed to fit into the end of the faceting machine's arm. To do this:
This will hold it in place during cutting and polishing.
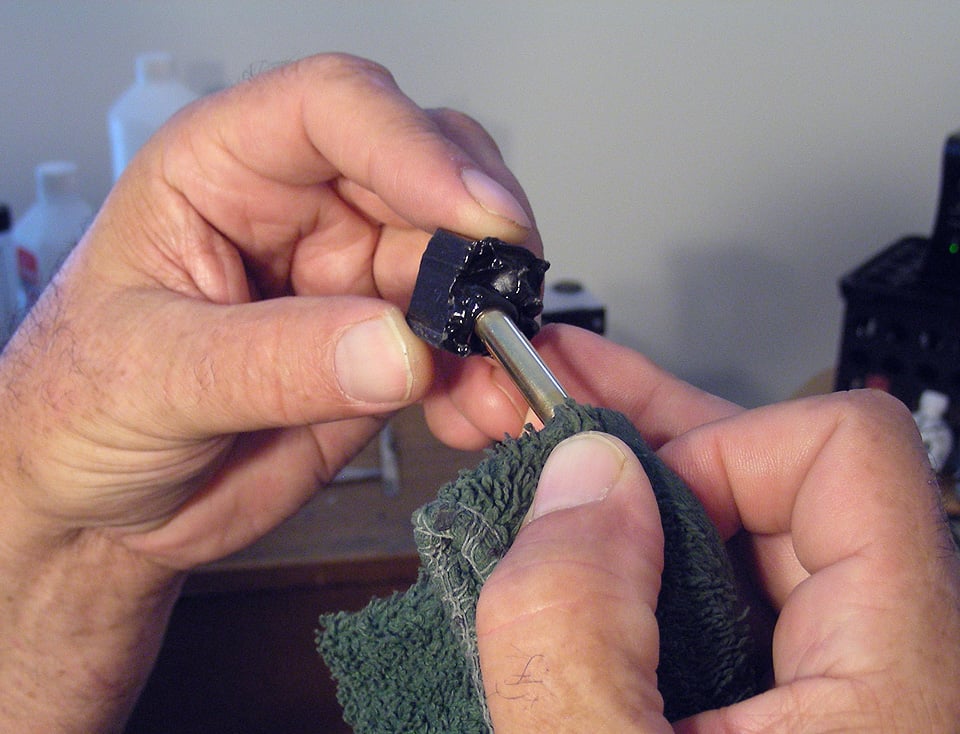
Use a transfer jig with a cone dop to help line up the stone on the dop. Make sure it's nicely centered. This will minimize the loss of face-up size and carat weight during recutting. This may be the most important step in the whole process. You may need a number of tries before getting the stone perfectly centered.
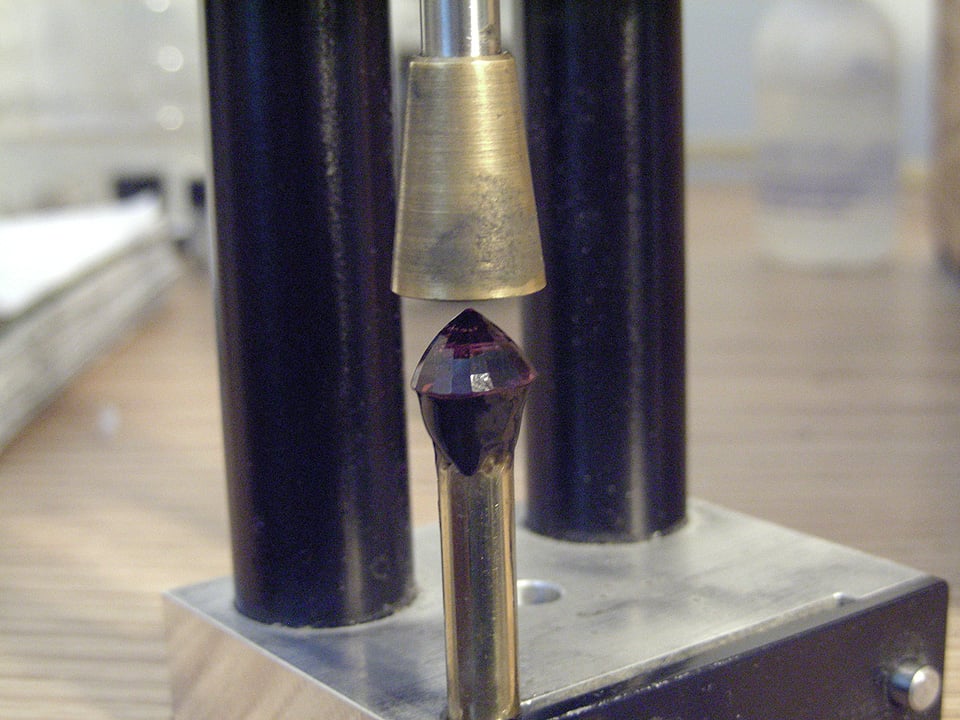
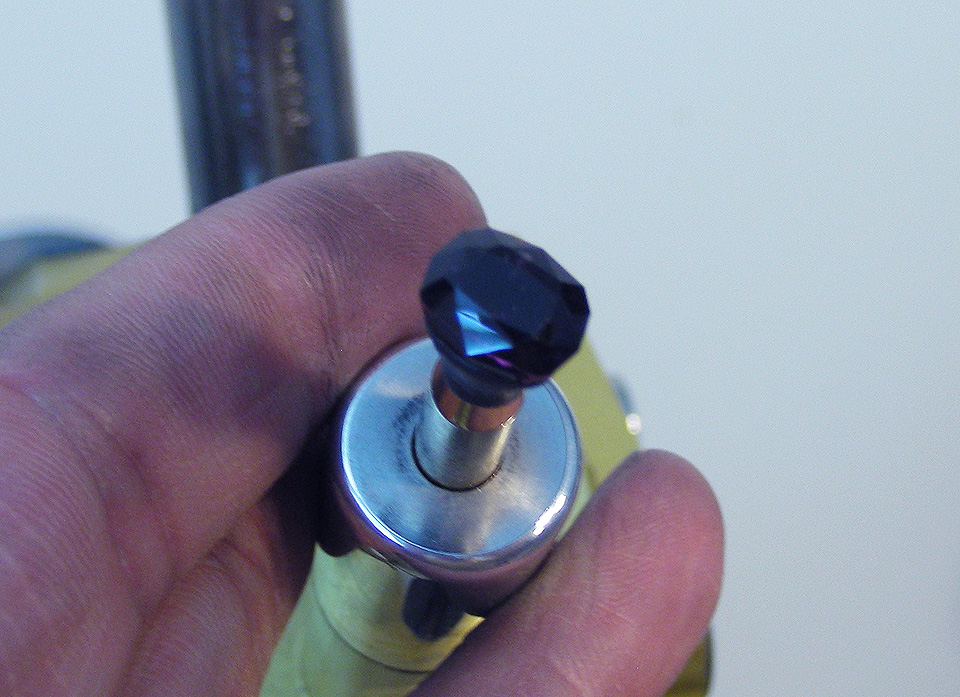
Next, plug the dop holding the stone into the end of the faceting machine arm. Then, lock the dop in place with the key shown in the lower front of the photo.

Now, we can start cutting (grinding flat spots, actually) using a diamond impregnated disc or lap. First, establish its shape by cutting the edges, also known as the girdle.
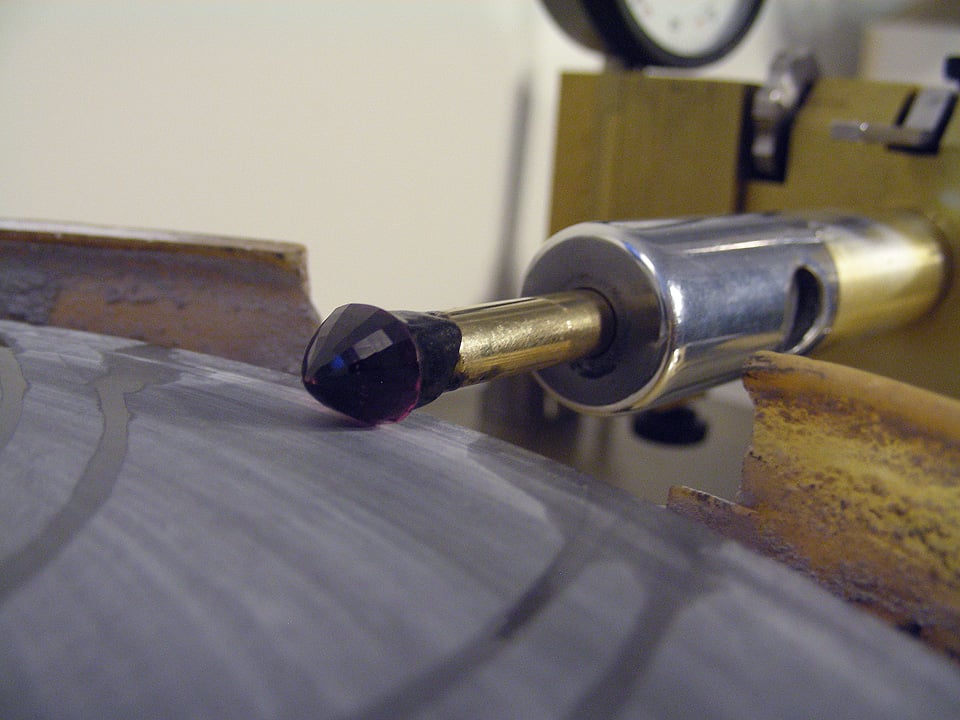
In this case, we'll convert the oval to a more brilliant, modern custom cushion emerald design.
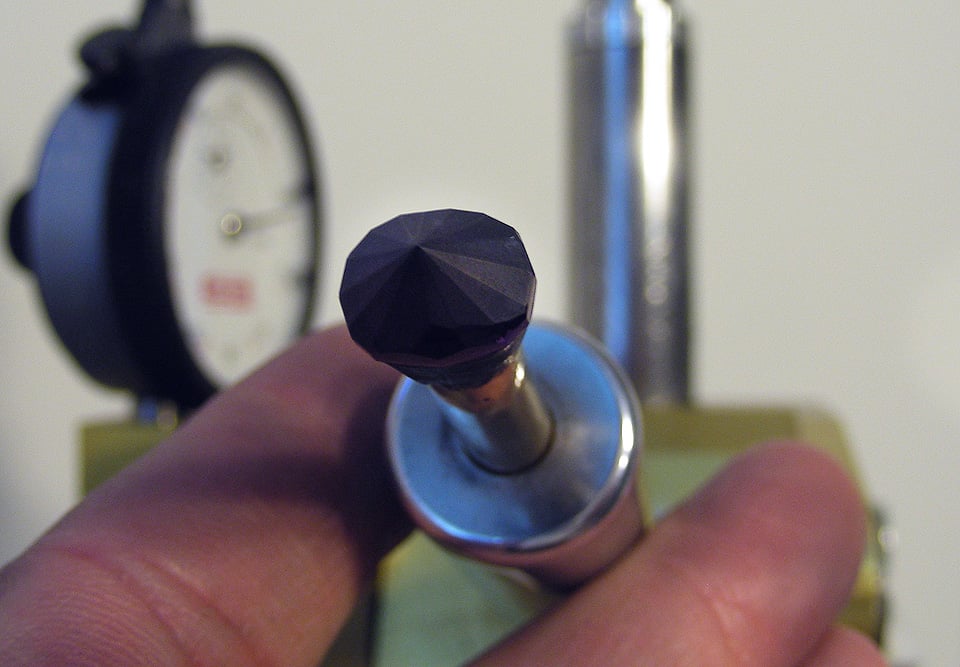
Although it's hard to see, the stone now has flat edges where the curved girdle used to be. In the photo, they appear a bit lighter in color than the polished surfaces.
Once you establish the girdle and shape, cut the bottom of the stone. You'll often use a diagram for this step when cutting a stone. However, in this case, we won't use instructions, since we're recutting the stone. We're trying to fit the new design into the existing stone's shape.
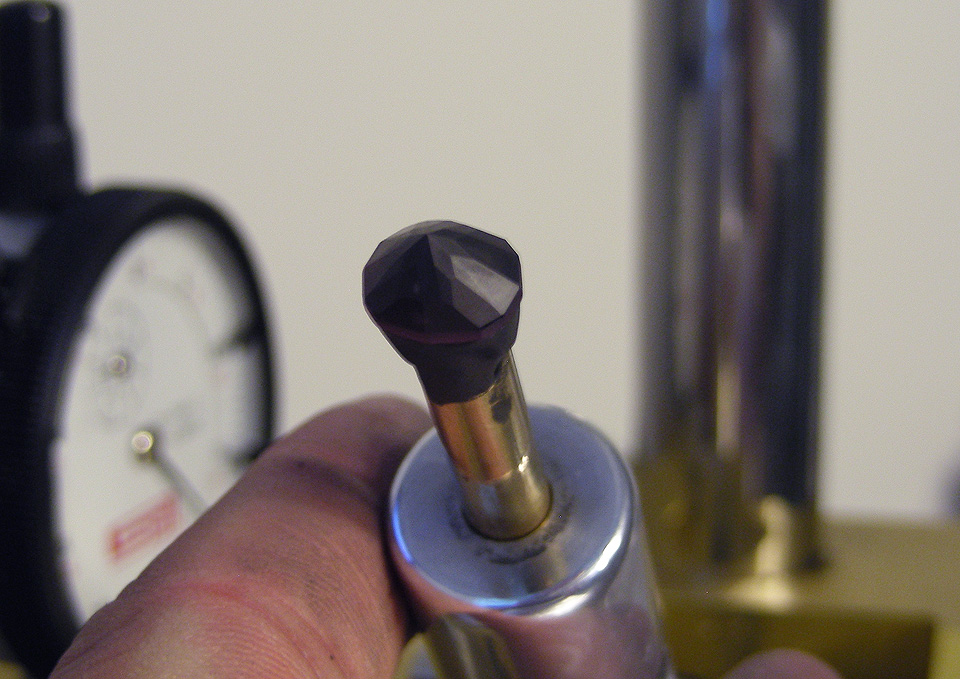
First, cut the facets around the stone to establish a point on the bottom.
Next, cut break facets around the bottom edge of the girdle so the stone will sit flat in a setting. (I also added eight little facets to the point on the bottom to increase the sparkle of the finished gem).
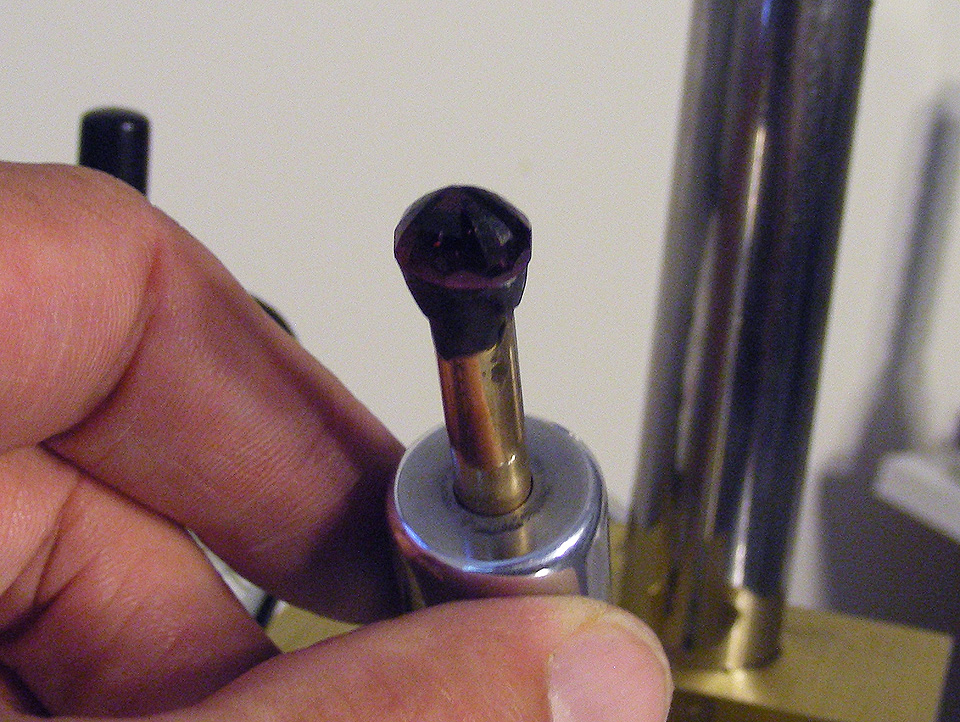
Polishing is the last part of cutting the bottom. In this case, our gem first receives a rough polish using 8K diamond. Then, it gets a final polishing using 100K super-fine diamond powder and a bit of oil.
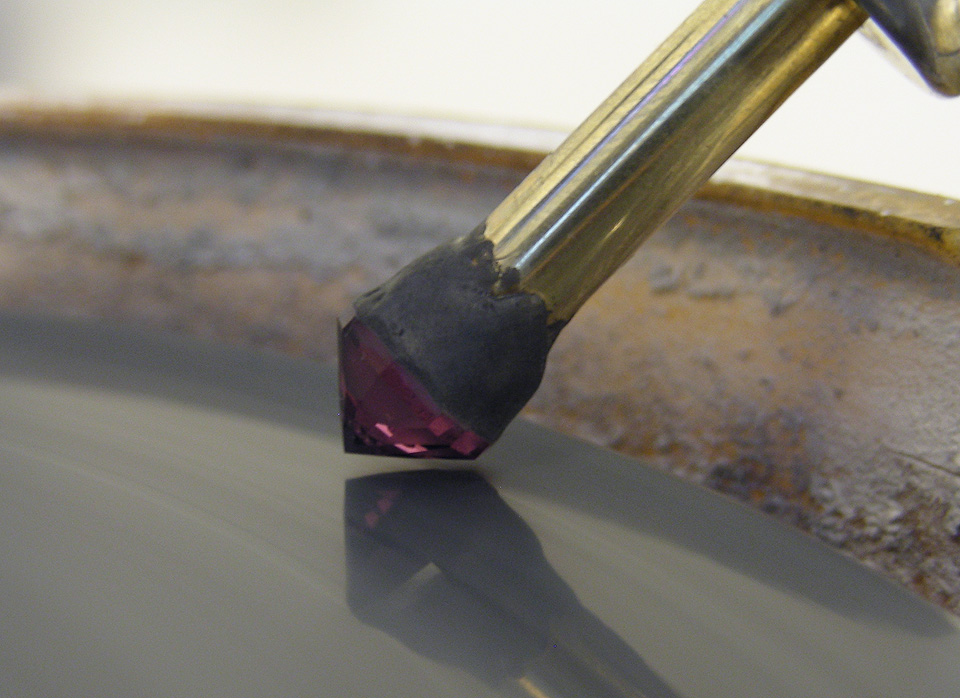
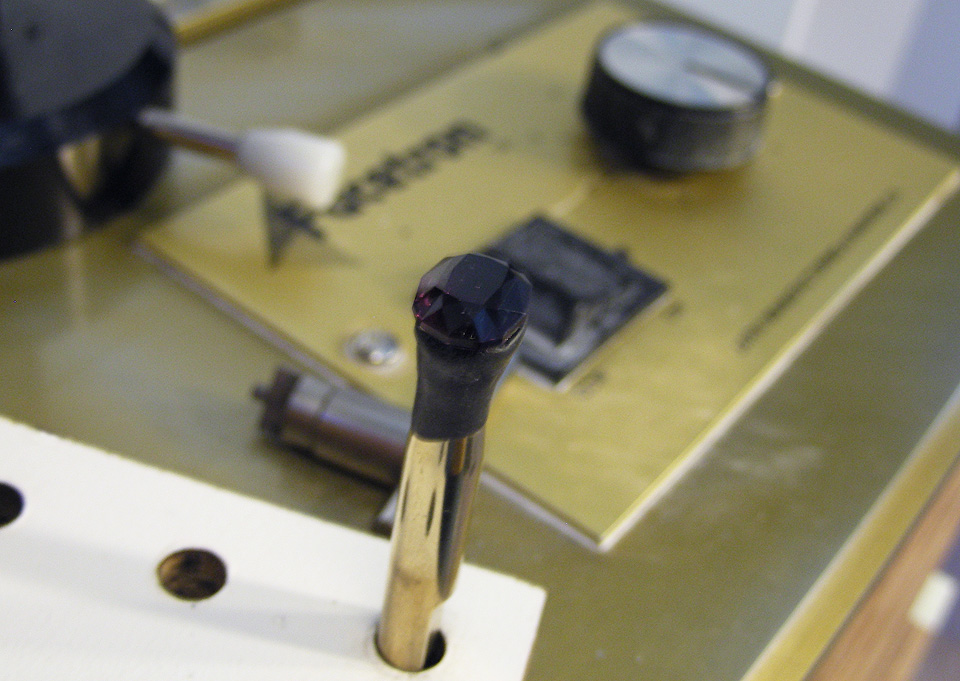
In this photo, you can see the partly polished bottom. That helps to reveal the design a bit
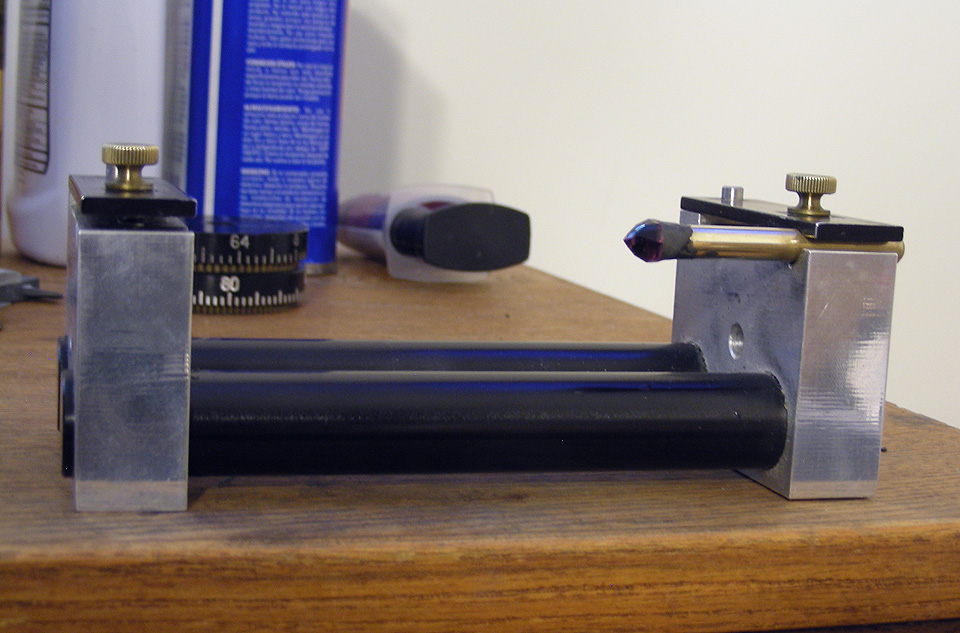
Once you've completely polished the stone's pavilion, remove the dop holding the stone from the faceting machine arm. Then, place the dop in the fixed end of the transfer jig. Note that the bracket on the left isn't fixed. It slides on the two black rails.
Next, repeat the process of getting wax on the end of a dop using the alcohol burner. In this case, use the dop with a cone-shaped receptacle at one end.
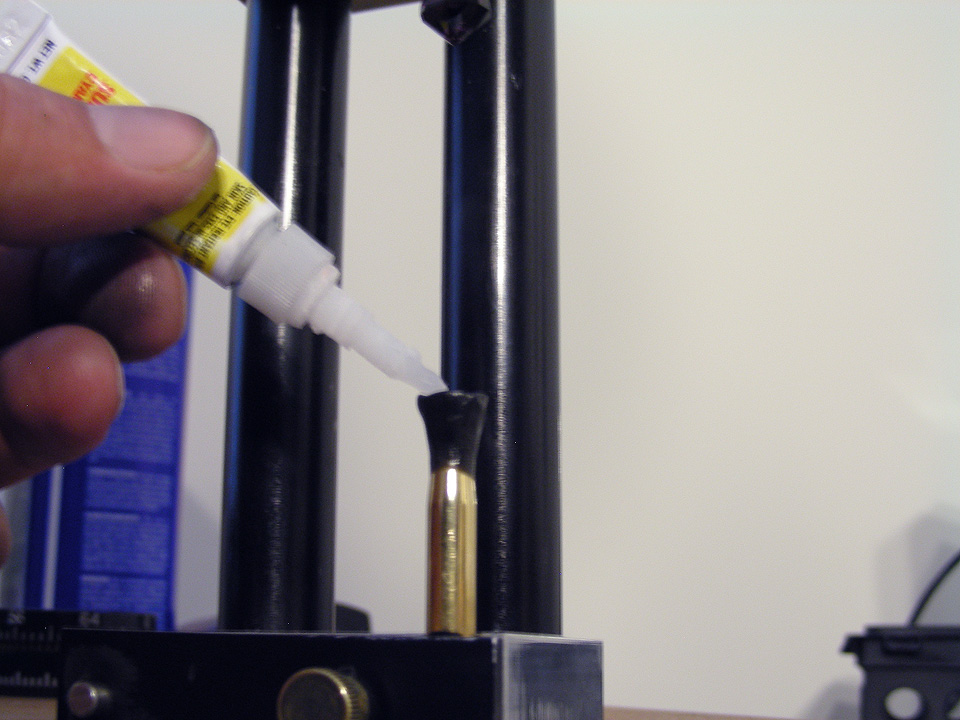
Once the wax is on the end, put the dop into the sliding end of the transfer jig, pressed up against the newly cut pavilion of our stone. This will make an impression in the wax. Then, put a tiny drop of super glue in the wax impression. This will ensure that the dop sticks well to the stone.
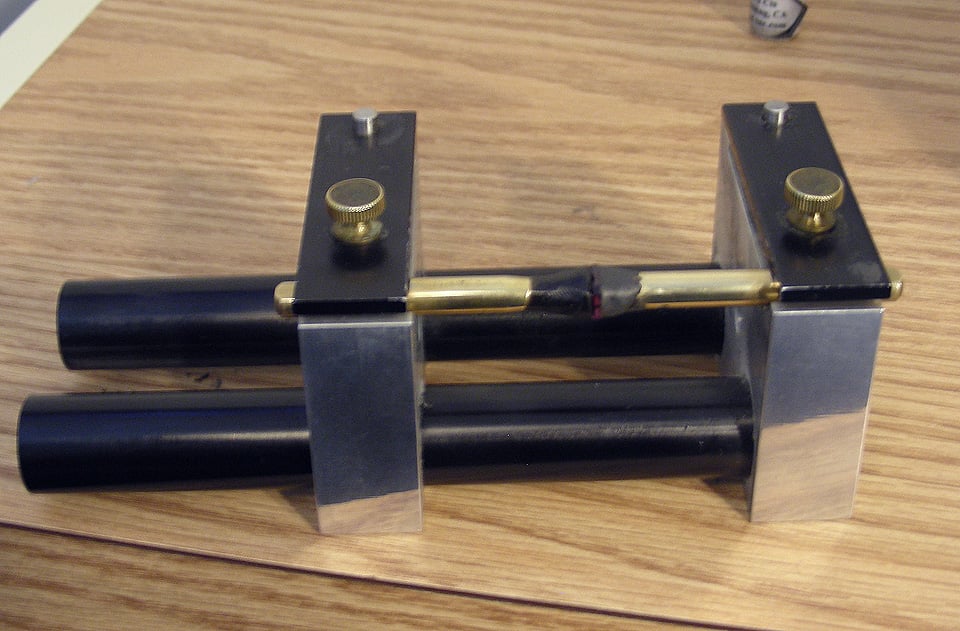
Next, slide the receiving dop into place against the stone.
Now, take a 10-minute break while the super glue has a chance to dry.
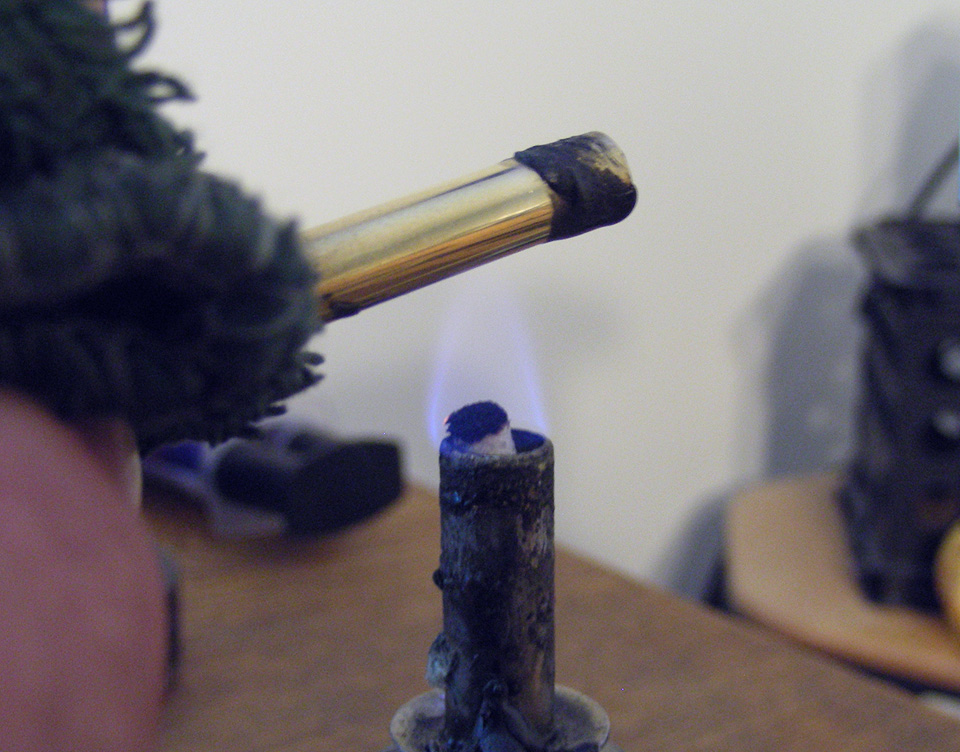
After that, hold the dop on the right over the flame. Heat it just enough to carefully soften the wax so it can be removed. This leaves us with a dop holding the stone ready to have the crown cut. This completes the transfer.
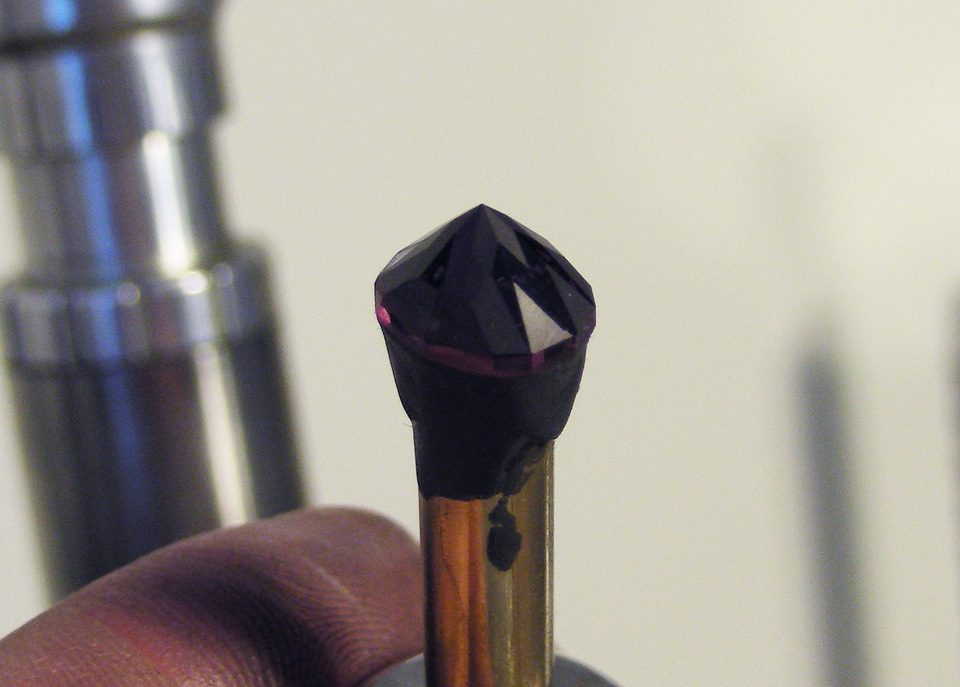
Take that dop and plug it into the end of the faceting machine arm, just like the last one. Now, we can start cutting a design for the top, or crown, of the stone.
Once you cut that crown design, you'll polish it using the same process you used for the pavilion. However, the difference here is we'll next need to cut a new table or flat spot on the stone's top.
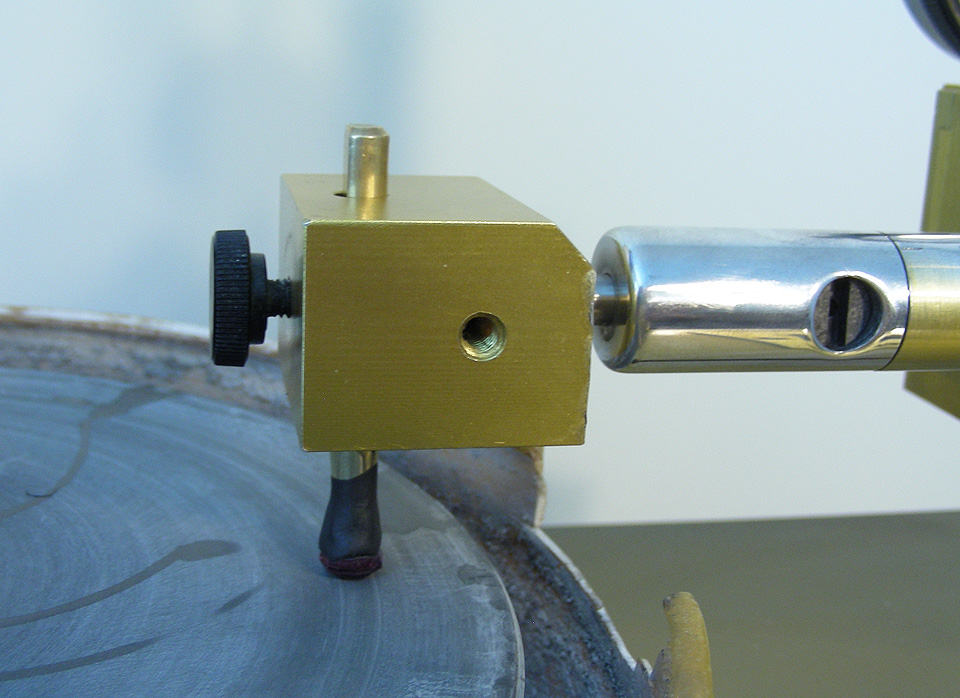
To cut the table, remove the dop stick from the machine arm. Replace the arm with a special 45 or 90° dop holder, the big metal block shown below. Then, plug the dop into the bottom of that block. This allows you to cut the table on the top of the stone.
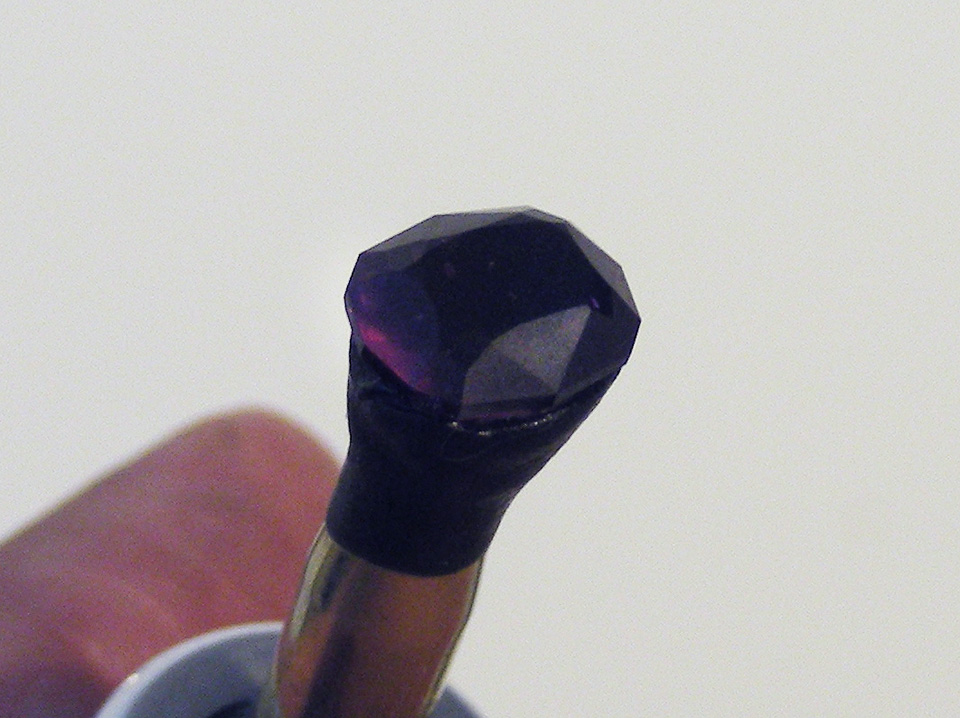
After cutting and polishing the table, remove the dop. You've completed the recut of the spinel. All you need to do now is heat the dop to soften the wax, remove the stone, and clean the dop wax and super glue off the bottom. Unfortunately, the dop wax makes the stone look black through most of the cutting process. So, you don't really know what it will look like until the reveal at the very end.
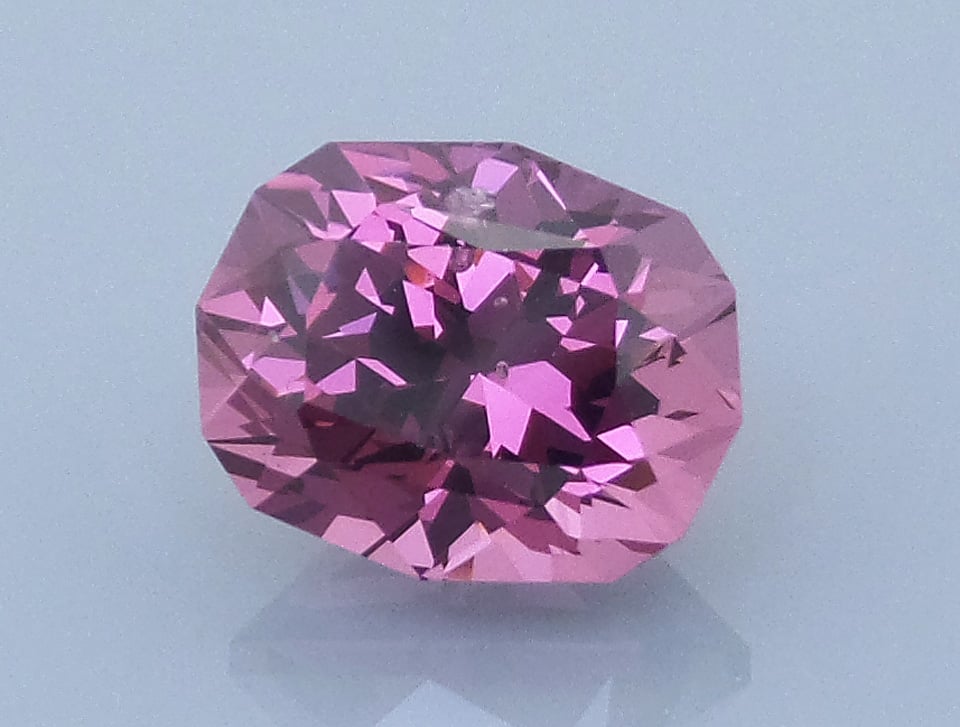
And there we have it! We now have a spinel much more beautiful in person. It went from 5.24 cts to 4.09 cts. However, usually very little of the face-up size is lost when doing a total recut to a similar shape. Most of the weight loss comes from removing the "belly" on the bottom of the stone. (Commercial cutters use this "belly" to keep the stone heavy, since stones sell by carat weight).
This stone is almost completely eye-clean in person. Do you see that inclusion on the side of the stone? It's actually a tiny zircon crystal inside the spinel!
See how the stone performs before and after recutting in the following videos.
Spinel Before Being Recut by Daniel Stair, from Ganoksin and IGS on Vimeo.
Spinel After Spinel After Being Recut by Daniel Stair, from Ganoksin and IGS on Vimeo.


When you join the IGS community, you get trusted diamond & gemstone information when you need it.
Gem cutters use the standard mixed cut for most all gem shapes. It consists of a bottom () and a top (). Step cutting is done using rectangular or square-shaped facets. Brilliant cutting is done using triangular, diamond, and/or kite-shaped facets.
Look at the spinel in the photo above. It's a prime example of some great gem material poorly cut.
I'll recut this gem using a Facetron faceting machine, probably the most popular faceting machine for custom gem cutting. Look at the photo below as I describe its features.
Before recutting gems, wipe them off with an alcohol swab. This will remove all traces of oil present on the surfaces.
Next, attach your stone to a flat-ended dop stick keyed to fit into the end of the faceting machine's arm. To do this:
This will hold it in place during cutting and polishing.
Use a transfer jig with a cone dop to help line up the stone on the dop. Make sure it's nicely centered. This will minimize the loss of face-up size and carat weight during recutting. This may be the most important step in the whole process. You may need a number of tries before getting the stone perfectly centered.
Next, plug the dop holding the stone into the end of the faceting machine arm. Then, lock the dop in place with the key shown in the lower front of the photo.
Now, we can start cutting (grinding flat spots, actually) using a diamond impregnated disc or lap. First, establish its shape by cutting the edges, also known as the girdle.
In this case, we'll convert the oval to a more brilliant, modern custom cushion emerald design.
Although it's hard to see, the stone now has flat edges where the curved girdle used to be. In the photo, they appear a bit lighter in color than the polished surfaces.
Once you establish the girdle and shape, cut the bottom of the stone. You'll often use a diagram for this step when cutting a stone. However, in this case, we won't use instructions, since we're recutting the stone. We're trying to fit the new design into the existing stone's shape.
First, cut the facets around the stone to establish a point on the bottom.
Next, cut break facets around the bottom edge of the girdle so the stone will sit flat in a setting. (I also added eight little facets to the point on the bottom to increase the sparkle of the finished gem).
Polishing is the last part of cutting the bottom. In this case, our gem first receives a rough polish using 8K diamond. Then, it gets a final polishing using 100K super-fine diamond powder and a bit of oil.
In this photo, you can see the partly polished bottom. That helps to reveal the design a bit
Once you've completely polished the stone's pavilion, remove the dop holding the stone from the faceting machine arm. Then, place the dop in the fixed end of the transfer jig. Note that the bracket on the left isn't fixed. It slides on the two black rails.
Next, repeat the process of getting wax on the end of a dop using the alcohol burner. In this case, use the dop with a cone-shaped receptacle at one end.
Once the wax is on the end, put the dop into the sliding end of the transfer jig, pressed up against the newly cut pavilion of our stone. This will make an impression in the wax. Then, put a tiny drop of super glue in the wax impression. This will ensure that the dop sticks well to the stone.
Next, slide the receiving dop into place against the stone.
Now, take a 10-minute break while the super glue has a chance to dry.
After that, hold the dop on the right over the flame. Heat it just enough to carefully soften the wax so it can be removed. This leaves us with a dop holding the stone ready to have the crown cut. This completes the transfer.
Take that dop and plug it into the end of the faceting machine arm, just like the last one. Now, we can start cutting a design for the top, or crown, of the stone.
Once you cut that crown design, you'll polish it using the same process you used for the pavilion. However, the difference here is we'll next need to cut a new table or flat spot on the stone's top.
To cut the table, remove the dop stick from the machine arm. Replace the arm with a special 45 or 90° dop holder, the big metal block shown below. Then, plug the dop into the bottom of that block. This allows you to cut the table on the top of the stone.
After cutting and polishing the table, remove the dop. You've completed the recut of the spinel. All you need to do now is heat the dop to soften the wax, remove the stone, and clean the dop wax and super glue off the bottom. Unfortunately, the dop wax makes the stone look black through most of the cutting process. So, you don't really know what it will look like until the reveal at the very end.
And there we have it! We now have a spinel much more beautiful in person. It went from 5.24 cts to 4.09 cts. However, usually very little of the face-up size is lost when doing a total recut to a similar shape. Most of the weight loss comes from removing the "belly" on the bottom of the stone. (Commercial cutters use this "belly" to keep the stone heavy, since stones sell by carat weight).
This stone is almost completely eye-clean in person. Do you see that inclusion on the side of the stone? It's actually a tiny zircon crystal inside the spinel!
See how the stone performs before and after recutting in the following videos.
Spinel Before Being Recut by Daniel Stair, from Ganoksin and IGS on Vimeo.


