

The 10X loupe is the gemologist's best friend. Learn how to examine gemstones for fractures, inclusions, color, and much more with this simple tool.
10 Minute Read
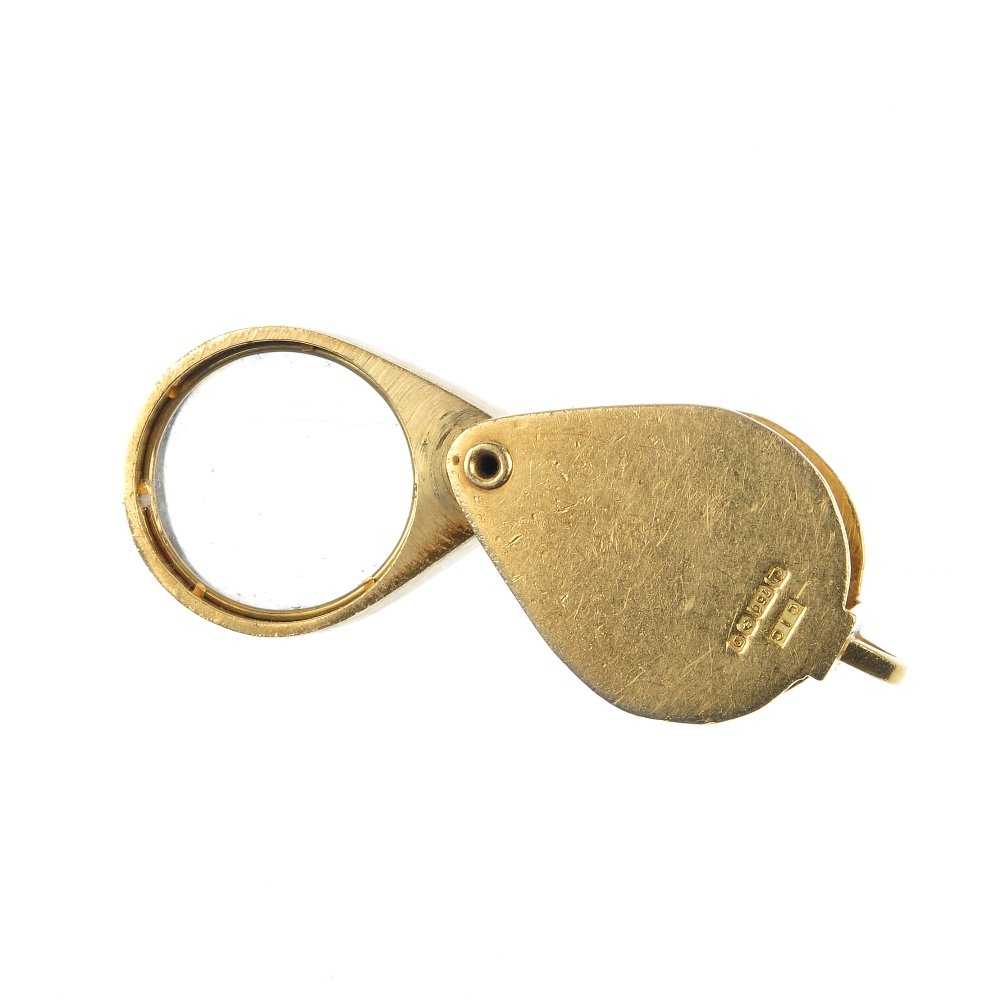
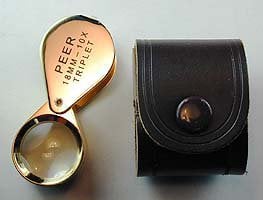
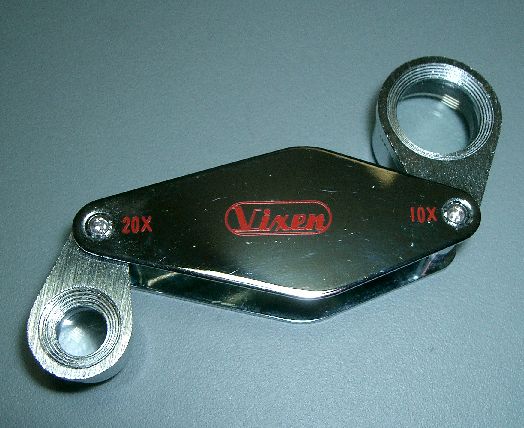
Loupes come in several varieties. Watchmakers prefer the kind held by the eye socket. Other professionals prefer loupes worn like eyeglasses or clipped onto glasses. Some types sport fancy features like illumination and built-in tweezers. Gemologists prefer the hand loupe.
For gemologists, the 10X loupe (with ten-power magnification) is the standard for hand-held gem identification. Although you'll find more powerful loupes, the depth of field (the area that's in focus) is so small above 10X that they're hard to use. Instead, use a microscope when you need higher magnification. With lower-powered magnification, you just can't see as much detail.
You may encounter the following terms when shopping for a 10X loupe.
These features increase the price.
The standard for judging diamond quality is what an expert can see in good lighting with a triplet, color-corrected 10X loupe. Gemologists use this same standard for evaluating colored stone quality, too. However, you don't need to purchase such an expensive variety for your gemological studies. You can get as much information and enjoyment from a less expensive model.
Using a loupe gracefully takes some practice but soon becomes second nature.
Before you focus on anything, consider the light around you.
With minimal adjustments and a little thought, you can often see both the surface and interior of a gem. Having too little light to see well is usually the only limitation.
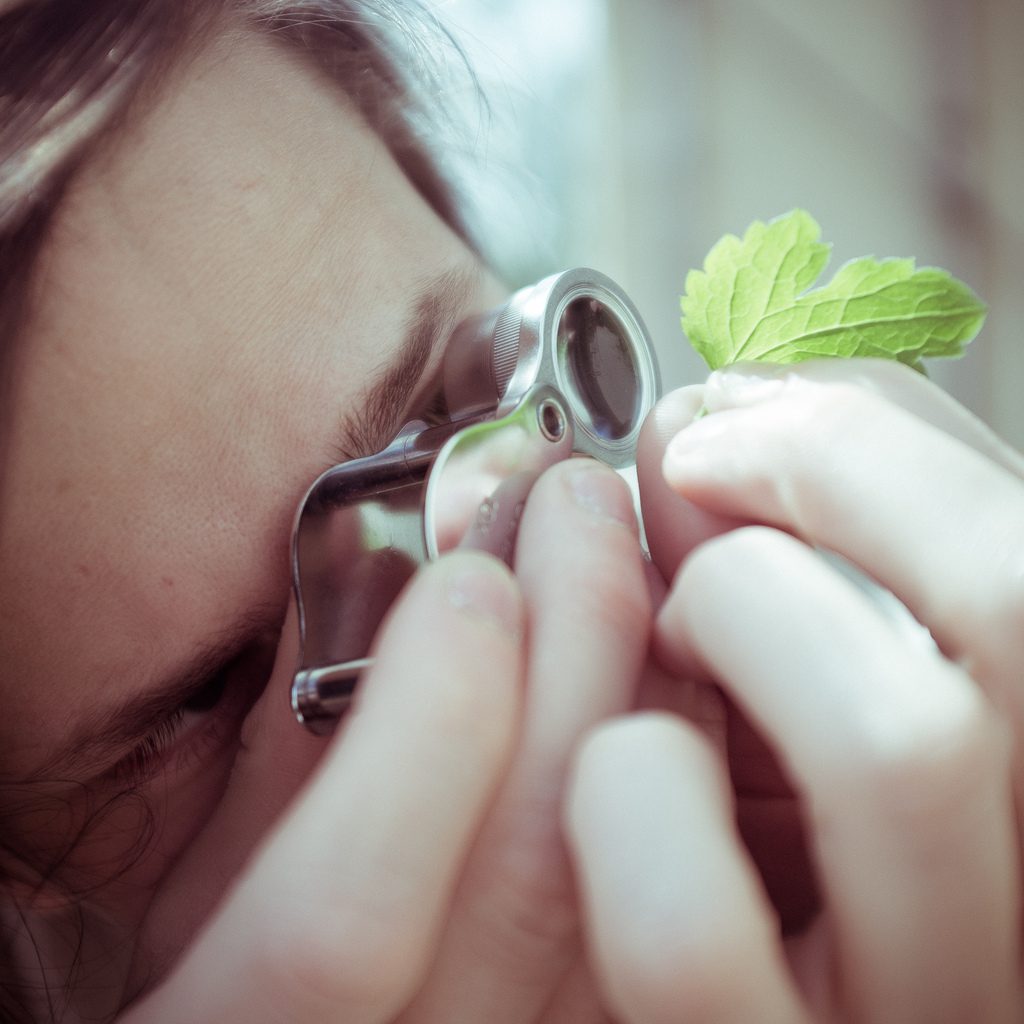
When you open a hand loupe, the cover becomes a handle. To use your loupe, slide your index finger through the opening, push out the loupe, then brace the hand holding the handle against your cheek to steady it. Now, you only have one hand to move for focusing. Do the following:
Practice adjusting the focus from the top surface to the far side. On a small gem, you can get the entire stone in focus at once. On a larger gem, you'll have to focus on one area at a time.
To judge the quality of a gem's faceting work, you need to study its surface.
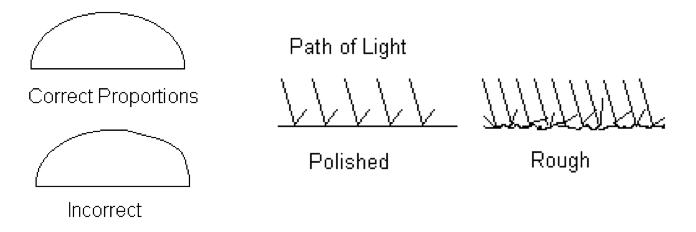
A smooth, glass-like surface is the sign of a perfect polish. You may see pits or scratches. However, if they are few and invisible without magnification, they'll have little effect on the beauty of the gem.
Sometimes, you'll see a stone with small pits covering its entire surface. Although invisible to the naked eye, they do affect the gem's brilliance. If you compare the stone to non-pitted stones of the same species, you'll see the reduction in brilliance more readily.
Occasionally, you'll have trouble distinguishing whether marks are on the surface or inside the gem. To resolve this, rotate the gem so the light reflects off the facets. When a facet acts as a mirror, inclusions beneath it disappear. However, scratches on the surface remain visible.
An unpolished girdle reveals the gem cutter was in a hurry. (A custom gem cutter would finish this off). Diamonds are an exception. Gem cutters cut them differently than colored stones because of their extreme hardness. Rounded, unpolished girdles are common in diamonds.
To further evaluate cutting quality, look at the facet meets. On a well-cut gem, they form sharp corners. All the facets in a row will be the same size and shape. You'll frequently see facets vary in size and corners that don't meet or overlap. If the differences are small, they won't affect a gem's beauty significantly. However, as the problems increase, the brilliance of the gem suffers.
Examine the sharpness of the facet edges. Due to diamond's hardness, they have the sharpest edges. This clue helps identify them. The edges of harder colored stones, such as rubies and sapphires, and cubic zirconia come in a close second. Softer gems (below a nine in hardness) usually have slightly rounded facet edges. Once in a while, you'll encounter a custom-cut gem with exceptionally sharp edges in a material of only 7 or 8 hardness. Although you may be unable to appreciate all the subtle decisions made cutting a gem like this, you can spot expert-quality work by the polish, meets, and facet edges.
Next, turn the gem upside down and look at the culet. Sometimes, gems carried together in paper wrappers suffer chips on the culet. This is called paper damage. Again, if invisible without magnification, this won't impact the gem's beauty significantly.
I hope you see how lapidary quality affects a gem. While a minor imperfection or two is acceptable, lots of sloppy work diminishes a gem's beauty, even if the individual instances are invisible to the naked eye. If you're a novice gemologist, using a 10X loupe gives you your first chance to appreciate this.
Start examining a cabochon by judging the polish, just as you would a faceted gem. Look for any scratches or pits that will reduce the amount of light reflected from the surface.
Next, check for contour evenness. A cabochon's surface should have an even curvature. Look at the cab from both ends and both sides. The shape, or curvature, should be a mirror image from side to side. No area should be thicker than its opposite. There should be no bulging.
Now, hold the gem so light reflects off its surface. Then, move the gem so the light travels across the top. On a properly cut surface, you'll see the band of reflected light glide evenly over it. On a surface with irregularities, the band of light will begin to snake. You'll most likely see this on the very top of the gem. You may not see a small, flattened area when viewing from the side but you will as light passes over it. Since light won't flow smoothly over this flattened area, you should consider the cabbing work second-rate. (If you look closely at that area, you'll likely find poor polishing, too).
The study of inclusions is one of the most interesting and useful elements of gemology. When you examine gems, you'll encounter quite a variety. Gemologists define an inclusion as anything internal that affects the flow of light. While this sounds negative, you'll also find some beautiful inclusions in natural gems. As you identify them and learn how they formed inside the gem, you may even find them nothing short of incredible.
You'll find fractures the easiest category of inclusions to identify. Emerald gems almost always have internal fractures. However, they're uncommon in most other gems. Tiny, internal fractures that don't reach the surface have minimal effect on a gem's durability. (Emerging from cutting without damage attests to that). On the other hand, larger fractures or those close to a thin edge pose risks. Fractures that reach the gem surface can absorb liquids. Over time, they will absorb dirt and skin oils, causing a loss of brilliance.
Emerald vendors may fill these fractures with oil of the same refractive index (RI) as the gem. This treatment makes the fractures less visible and reduces the likelihood they'll absorb skin oils. To see these filled fractures, look very closely and get the light on them from just the right angle. If you see a multicolored radiance, like an oil slick, you've spotted one.
Sometimes, a fracture will stand out, interrupting the flow of light. Other times, the fracture is pressed together so tightly that light will flow right through it. This type will show a bright, multicolored flash when light strikes it from the correct angle.
Most fractures have at least a slight bit of curvature. You must look carefully to see this. If you encounter a perfectly straight fracture, you've likely found a cleavage fracture. Gems have cleavage planes, much like the grain of wood. Along the cleavage plane, the gem splits easily. Finding a cleavage fracture in a gem signals a notable weakness.
Minerals, whether small bits of debris or whole crystals, are another common type of inclusion. They can be spectacular. Afghan peridot sometimes contains clusters of tourmaline that look like flies. Tiny spinel crystals arranged in a plane sometimes include another spinel.
Some mineral inclusions are opaque, such as black "carbon spots" on diamonds. How much they interfere with the passage of light depends on their size and number. Other inclusions are transparent. Their visibility depends on their RI. If this differs significantly from the surrounding crystal's, they will jump right out at you. In other cases, like spinel in spinel, they're nearly invisible. To see them, you need a dark background behind the gem and light coming from the sides.
Silk is a pattern of very slender, thread-like crystals. It's found in several gems but is particularly common in corundum, spinel, and garnet. You'll get the impression you're looking at a gem through a fine layer of silk, if the crystals are fine enough and all arranged in the same direction. The greater the silk saturation, the more the gem's brilliance will suffer. (However, these inclusions also produce asterism in prized star sapphires).
You'll also see many voids or cavities in your gems. As crystals form, they sometimes trap gas bubbles inside. Cavities may also contain liquids or other crystals. For gemologists, finding two or three fillings in one void is a rare treat and significant clue for gem identification.
Sometimes, you might see what looks surprisingly like a fingerprint in a gem. That is called a healing fracture. At some point in the past, the crystal broke. When the conditions for growth returned, the crystal healed or grew back together.
Fractures, minerals, and voids are the primary types of inclusions you'll commonly encounter. However, you'll also find some interesting inclusions in specific gems. For example, peridot may contain lily pad inclusions, small black spots surrounded by a curved fracture that look just like lily pads. These are common and easy to spot. Rubies and sapphires may show something similar. Sometimes, they contain opaque inclusions with fractures around them, though not as beautiful or symmetrical as those in peridot. These indicate the gem has been heat treated. The inclusions burst due to heating, creating the fractures.
Color in gems may not always be distributed evenly. For example, lapidaries cut stones such as ametrine and watermelon tourmaline to show off the separate colors. In most gems, however, you need to look carefully to see them.
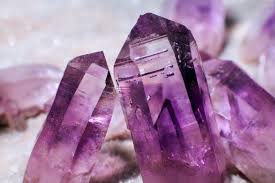
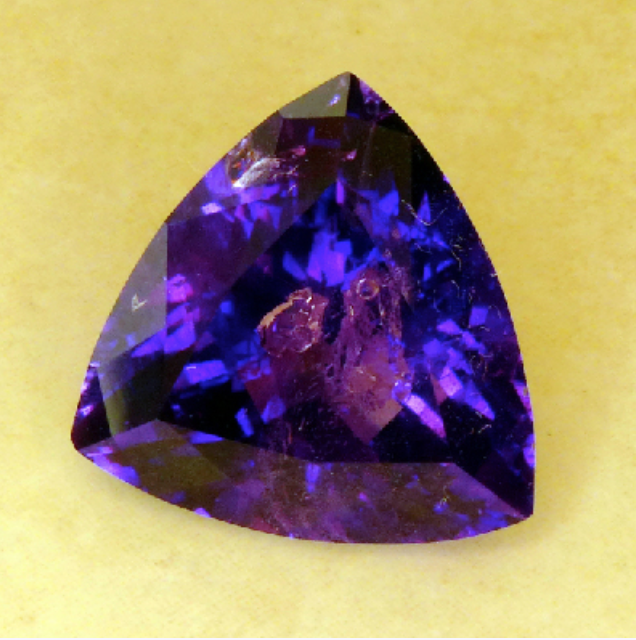
Amethyst may show color zoning, areas of dark purple surrounded by lighter purple or even colorless quartz. By careful cutting and orienting the color in the culet, you can make the gem evenly colored when face up. This will bring the most eye appeal to the gem. The value of the gem decreases if you can see the zoning face up or with slight tipping.
Sapphires also commonly show zoning. Again, if you can't see the zoning face up, it doesn't affect the value of the gem.
While the color zones in an amethyst are random, the zoning in a sapphire occurs in straight bands. They're present even if they're not distinct enough to be seen with the naked eye. To see them best, view the gem with a 10X loupe from the bottom with light coming from behind it.
You have to look directly on to the plane of color to distinguish the banding. Due to the cutting, you'll only see the banding in one facet at a time. To see this takes a bit of practice, but it's worth learning.

Once you see the banding, check if it's straight or curved. Any curvature you see will be subtle but significant, so look carefully.
If the banding or striae is curved, the sapphire is a flame-fusion synthetic. (However, straight banding can be due to natural or synthetic origin).
You can get a lot of information from your 10X loupe. If you're a beginner, you'll probably have dozens of questions after trying out the hand loupe. Let those questions direct you to your next level of study.
Just remember two things: practice makes perfect and take your time. Gather as much information as you can from your loupe inspections.

Budget


When you join the IGS community, you get trusted diamond & gemstone information when you need it.

Loupes come in several varieties. Watchmakers prefer the kind held by the eye socket. Other professionals prefer loupes worn like eyeglasses or clipped onto glasses. Some types sport fancy features like illumination and built-in tweezers. Gemologists prefer the hand loupe.
For gemologists, the 10X loupe (with ten-power magnification) is the standard for hand-held . Although you'll find more powerful loupes, the depth of field (the area that's in focus) is so small above 10X that they're hard to use. Instead, use a when you need higher magnification. With lower-powered magnification, you just can't see as much detail.
You may encounter the following terms when shopping for a 10X loupe.
These features increase the price.
The standard for judging diamond quality is what an expert can see in good lighting with a triplet, color-corrected 10X loupe. Gemologists use this same standard for evaluating colored stone quality, too. However, you don't need to purchase such an expensive variety for your gemological studies. You can get as much information and enjoyment from a less expensive model.
Using a loupe gracefully takes some practice but soon becomes second nature.
Before you focus on anything, consider the light around you.
With minimal adjustments and a little thought, you can often see both the surface and interior of a gem. Having too little light to see well is usually the only limitation.
When you open a hand loupe, the cover becomes a handle. To use your loupe, slide your index finger through the opening, push out the loupe, then brace the hand holding the handle against your cheek to steady it. Now, you only have one hand to move for focusing. Do the following:
Practice adjusting the focus from the top surface to the far side. On a small gem, you can get the entire stone in focus at once. On a larger gem, you'll have to focus on one area at a time.
To judge the quality of a gem's faceting work, you need to study its surface.
A smooth, glass-like surface is the sign of a perfect polish. You may see pits or scratches. However, if they are few and invisible without magnification, they'll have little effect on the beauty of the gem.
Sometimes, you'll see a stone with small pits covering its entire surface. Although invisible to the naked eye, they do affect the gem's brilliance. If you compare the stone to non-pitted stones of the same species, you'll see the reduction in brilliance more readily.
Occasionally, you'll have trouble distinguishing whether marks are on the surface or inside the gem. To resolve this, rotate the gem so the light reflects off the facets. When a facet acts as a mirror, inclusions beneath it disappear. However, scratches on the surface remain visible.
An unpolished girdle reveals the gem cutter was in a hurry. (A custom gem cutter would finish this off). Diamonds are an exception. Gem cutters cut them differently than colored stones because of their extreme hardness. Rounded, unpolished girdles are common in diamonds.
To further evaluate cutting quality, look at the facet meets. On a well-cut gem, they form sharp corners. All the facets in a row will be the same size and shape. You'll frequently see facets vary in size and corners that don't meet or overlap. If the differences are small, they won't affect a gem's beauty significantly. However, as the problems increase, the brilliance of the gem suffers.
Examine the sharpness of the facet edges. Due to diamond's hardness, they have the sharpest edges. This clue helps identify them. The edges of harder colored stones, such as rubies and sapphires, and cubic zirconia come in a close second. Softer gems (below a nine in hardness) usually have slightly rounded facet edges. Once in a while, you'll encounter a custom-cut gem with exceptionally sharp edges in a material of only 7 or 8 hardness. Although you may be unable to appreciate all the subtle decisions made cutting a gem like this, you can spot expert-quality work by the polish, meets, and facet edges.
Next, turn the gem upside down and look at the culet. Sometimes, gems carried together in paper wrappers suffer chips on the culet. This is called paper damage. Again, if invisible without magnification, this won't impact the gem's beauty significantly.
I hope you see how lapidary quality affects a gem. While a minor imperfection or two is acceptable, lots of sloppy work diminishes a gem's beauty, even if the individual instances are invisible to the naked eye. If you're a novice gemologist, using a 10X loupe gives you your first chance to appreciate this.
Start examining a cabochon by judging the polish, just as you would a faceted gem. Look for any scratches or pits that will reduce the amount of light reflected from the surface.
Next, check for contour evenness. A cabochon's surface should have an even curvature. Look at the cab from both ends and both sides. The shape, or curvature, should be a mirror image from side to side. No area should be thicker than its opposite. There should be no bulging.
Now, hold the gem so light reflects off its surface. Then, move the gem so the light travels across the top. On a properly cut surface, you'll see the band of reflected light glide evenly over it. On a surface with irregularities, the band of light will begin to snake. You'll most likely see this on the very top of the gem. You may not see a small, flattened area when viewing from the side but you will as light passes over it. Since light won't flow smoothly over this flattened area, you should consider the cabbing work second-rate. (If you look closely at that area, you'll likely find poor polishing, too).
The study of inclusions is one of the most interesting and useful elements of gemology. When you examine gems, you'll encounter quite a variety. Gemologists define an inclusion as anything internal that affects the flow of light. While this sounds negative, you'll also find some beautiful inclusions in natural gems. As you identify them and learn how they formed inside the gem, you may even find them nothing short of incredible.
You'll find fractures the easiest category of inclusions to identify. Emerald gems almost always have internal fractures. However, they're uncommon in most other gems. Tiny, internal fractures that don't reach the surface have minimal effect on a gem's durability. (Emerging from cutting without damage attests to that). On the other hand, larger fractures or those close to a thin edge pose risks. Fractures that reach the gem surface can absorb liquids. Over time, they will absorb dirt and skin oils, causing a loss of brilliance.
Emerald vendors may fill these fractures with oil of the same refractive index (RI) as the gem. This treatment makes the fractures less visible and reduces the likelihood they'll absorb skin oils. To see these filled fractures, look very closely and get the light on them from just the right angle. If you see a multicolored radiance, like an oil slick, you've spotted one.
Sometimes, a fracture will stand out, interrupting the flow of light. Other times, the fracture is pressed together so tightly that light will flow right through it. This type will show a bright, multicolored flash when light strikes it from the correct angle.
Most fractures have at least a slight bit of curvature. You must look carefully to see this. If you encounter a perfectly straight fracture, you've likely found a cleavage fracture. Gems have cleavage planes, much like the grain of wood. Along the cleavage plane, the gem splits easily. Finding a cleavage fracture in a gem signals a notable weakness.
Minerals, whether small bits of debris or whole crystals, are another common type of inclusion. They can be spectacular. Afghan peridot sometimes contains clusters of tourmaline that look like flies. Tiny spinel crystals arranged in a plane sometimes include another spinel.
Some mineral inclusions are opaque, such as black "carbon spots" on diamonds. How much they interfere with the passage of light depends on their size and number. Other inclusions are transparent. Their visibility depends on their RI. If this differs significantly from the surrounding crystal's, they will jump right out at you. In other cases, like spinel in spinel, they're nearly invisible. To see them, you need a dark background behind the gem and light coming from the sides.
Silk is a pattern of very slender, thread-like crystals. It's found in several gems but is particularly common in corundum, spinel, and garnet. You'll get the impression you're looking at a gem through a fine layer of silk, if the crystals are fine enough and all arranged in the same direction. The greater the silk saturation, the more the gem's brilliance will suffer. (However, these inclusions also produce asterism in prized star sapphires).
You'll also see many voids or cavities in your gems. As crystals form, they sometimes trap gas bubbles inside. Cavities may also contain liquids or other crystals. For gemologists, finding two or three fillings in one void is a rare treat and significant clue for gem identification.
Sometimes, you might see what looks surprisingly like a fingerprint in a gem. That is called a healing fracture. At some point in the past, the crystal broke. When the conditions for growth returned, the crystal healed or grew back together.
Fractures, minerals, and voids are the primary types of inclusions you'll commonly encounter. However, you'll also find some interesting inclusions in specific gems. For example, peridot may contain lily pad inclusions, small black spots surrounded by a curved fracture that look just like lily pads. These are common and easy to spot. Rubies and sapphires may show something similar. Sometimes, they contain opaque inclusions with fractures around them, though not as beautiful or symmetrical as those in peridot. These indicate the gem has been heat treated. The inclusions burst due to heating, creating the fractures.
Color in gems may not always be distributed evenly. For example, lapidaries cut stones such as ametrine and watermelon tourmaline to show off the separate colors. In most gems, however, you need to look carefully to see them.
Amethyst may show color zoning, areas of dark purple surrounded by lighter purple or even colorless quartz. By careful cutting and orienting the color in the culet, you can make the gem evenly colored when face up. This will bring the most eye appeal to the gem. The value of the gem decreases if you can see the zoning face up or with slight tipping.
Sapphires also commonly show zoning. Again, if you can't see the zoning face up, it doesn't affect the value of the gem.
While the color zones in an amethyst are random, the zoning in a sapphire occurs in straight bands. They're present even if they're not distinct enough to be seen with the naked eye. To see them best, view the gem with a 10X loupe from the bottom with light coming from behind it.
You have to look directly on to the plane of color to distinguish the banding. Due to the cutting, you'll only see the banding in one facet at a time. To see this takes a bit of practice, but it's worth learning.
Once you see the banding, check if it's straight or curved. Any curvature you see will be subtle but significant, so look carefully.
If the banding or striae is curved, the sapphire is a flame-fusion synthetic. (However, straight banding can be due to natural or synthetic origin).
You can get a lot of information from your 10X loupe. If you're a beginner, you'll probably have dozens of questions after trying out the hand loupe. Let those questions direct you to your next level of study.
Just remember two things: practice makes perfect and take your time. Gather as much information as you can from your loupe inspections.
Budget


