
A checkerboard heart design is a great choice for a red or pink gem. Jeff Graham takes novice cutters through the faceting process, step by step.
7 Minute Read

If you want to cut your own "Heart Squared," you can find information on it here.
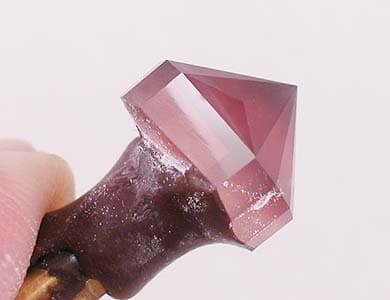
I picked a light pink Nigerian tourmaline to proof cut this checkerboard heart. In my opinion, pink and red are the two best colors for this heart. This design would also work well in a piece of lab-created red beryl or alexandrite if you want to cut something unique.
I recommend cutting this heart in large-sized rough, just because it's easier to see the checkers and make the design work. 10 mm and up would make a good size.
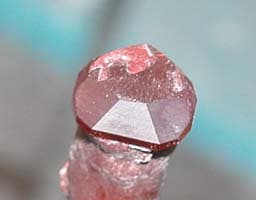
As you can see, my rough wasn't too large. Still, I got quite a good yield from it.
When you dop a stone to cut this design, set the point of the heart/rough at the 96 index (to be cut), if you have a keyed dop. Of course, this will vary depending on your machine. Just be aware that you may need to orient the rough.

I cut P1 in to about where I think the centerpoint will be. No, I didn't use the cam point. I very seldom do. For me, it's just easier to cut (but I've had a lot of practice).
Make sure to cut the checkerboard heart pavilion centered over the dop, like most hearts. You can cut all the pavilion tiers to 43° to create a temporary center. Then, cut them to their proper angles.
To cut these tiers, I switched to a fine 1,2000 lap. Especially on small stones, the angles are close on the pavilion, so it's very easy to over-cut.
The checkerboard heart needs a good, accurate centerpoint, since it lines up this design. Later on, the girdle facets and the checkerboard facets on the crown depend on a good centerpoint (pavilion) to line up easily.
Notice that the P2 and P3 tiers are close in angle to each other and cut fast, especially in small stones. (This is one reason I recommend cutting this design in a large size).
As you can see, everything is lining up.
When you're cutting this design, it's important to get the girdle and pavilion meetpoints lined up to each other correctly. The checkerboard crown, while not that difficult to cut, definitely benefits from taking a little more time and aligning the pavilion and girdle to each other correctly at this stage. (Like all checkerboard crowns, some tweaks and adjustments will be needed to get exact meetpoints when cutting and/or polishing the crown).
I cut the P15(G) to meet the rest of the girdle. Note that I cut the P15(G) before the P16 to establish the meetpoints for the P16.
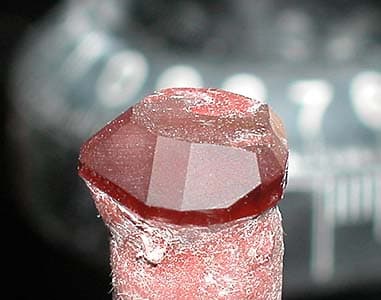
At this point, all the girdle facets are cut. As you can see, the stone now looks like a heart.
I prefer to polish the girdle first and started with the P15(G) facet. However, this is a personal preference. You can certainly polish in another order or even start with the pavilion. I just always find it easier to polish the girdles first.
I set the angle at 89.8° or so and only polished the bottom half of the girdle facets. There's no need to spend time and energy polishing the whole girdle facet. You only need to polish the part of the girdle that will remain after cutting in the crown. In other words, only polish the part of the girdle you're going to keep.
After polishing all the girdle facets, I started polishing the pavilion.
I polished the P1 facets first, partly because they establish the pavilion. Polishing the P1 tier gives me a good, sharp centerpoint for polishing the rest of the pavilion tiers. It really helps to have an easy-to-see pavilion point to polish to as you go around the pavilion.
As you can see, polishing the P1 tier gives a nice, defined centerpoint.
Next, I go around and polish all the pavilion tiers, except the P15 tier. I left it for last, since it's easier to polish those facets into a final meetpoint when everything else is polished in.
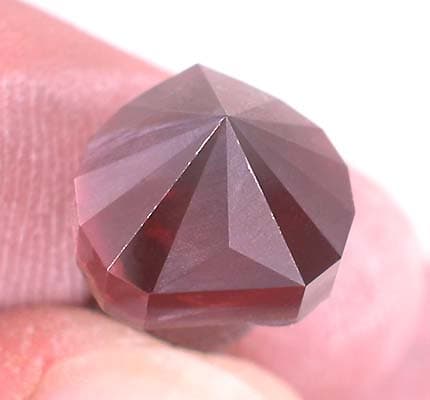
As you can see, all the pavilion tiers are polished, and the pavilion centerpoint is sharp and clear. I also polished in the P17 facet before the P15. This makes my girdle meets sharp, and I can just polish (float) the P15 facets in, so that everything is sharp and centerpointed at both the girdle and pavilion point.
At this stage, the pavilion is ready to transfer. Now is a very good time to examine all the pavilion and girdle tiers and make sure they're all polished. The checkerboard heart design has so many tier and angle changes that you can easily miss a facet. After transferring the stone, your odds of "finding" a facet you missed and polishing it are remote. Even if you succeed, it's a major pain, so check now before you take the dop out of the quill.
Notice that I used the 48 index girdle facet to align the stone after transfer. Why? Because the 48 index is the longest girdle facet and, therefore, the easiest to line up. I used a V-dop on the transfer because my centerpoint wasn't quite centered. Since V-dops don't have a key, I could just use any girdle facet I wanted. However, if you use a keyed dop, make sure you align the point of the heart correctly. Remember, the transfer reversed things.
Next, I cut in the girdle break tiers.
Make sure you leave enough crown so you don't cramp yourself when cutting in the breaks. So, if anything, err on the side of more crown material rather than less. The crown tier facets on this design, because of the heart shape, will look a little different as you cut them in.
Here's a tip: cut in all the crown breaks using 52.33°, the C7 angle. This makes lining up the crown so much easier. After lining up the crown, I re-cut all the crown tiers at their respective angles.
Cut these tiers slowly. This is important. A mistake and/or over-cut at this time will cost you a lot of work and girdle thickness you likely don't have. The points, particularly at the girdle, are easy to over-cut.
At this stage, I've cut all the crown tiers, except for C13.
Notice that where the C13 tier cuts in, you can see little points. You just need to rub in the C13 tier gently. These shallow facets won't take much cutting. I leave them for last.
I also roughed in the table. (Note: the picture above doesn't show the table. The flat you see is just the flat spot that was ground on the rough for dopping).
At this point, the crown is roughed in. If you're cutting your own stone, you'll now see some alignment problems, but these are minor and pretty typical of almost any checkerboard cut. For example, all the checkers may not line up evenly the first time. However, the checkers will get lined up in the next fine cutting stage. If necessary, you can tweak them during polishing.
After cutting all the crown tiers with a fine lap, I polished the table.
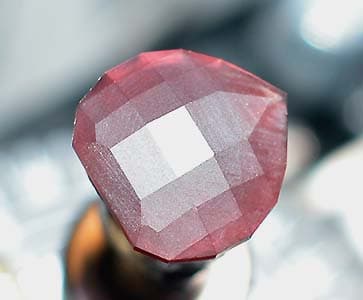
As you can see, now the checkerboards are all pretty much lined up. I polished the table at this time because this is where all the meets have to be perfect. Any meetpoint errors will be obvious on the table facet. You can't fudge the meets on the table of a checkerboard design, particularly this one. So, polish the table first, then line up the checkers as you polish towards the girdle.
This is a good habit to develop when you're cutting any checkerboard heart design, because you can tweak and align facets as you go along. If you have a problem, you can minimize it around the girdle, where it won't show. This design isn't really all that hard to polish, but it will take a little tweaking here and there to get all the checkers lined up evenly.
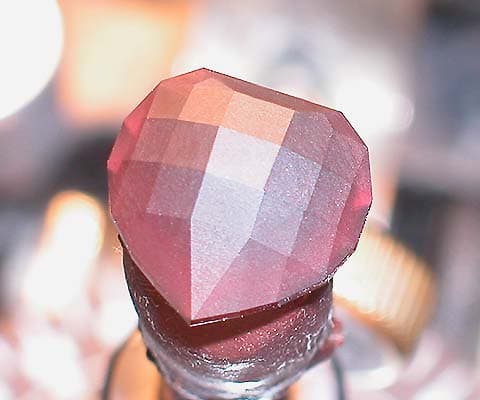
If you look closely at the picture above, a few places need aligning. However, the checkers aren't really as far off as they may appear. The combination of polished and unpolished checkers makes them appear more out of alignment than they really are.
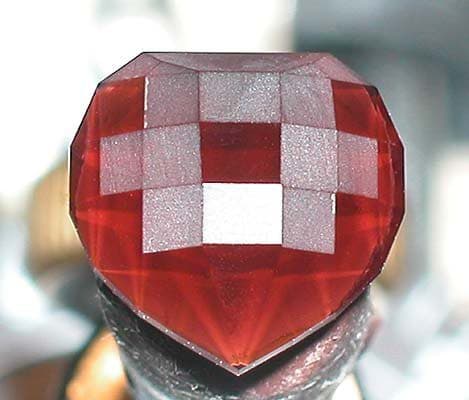
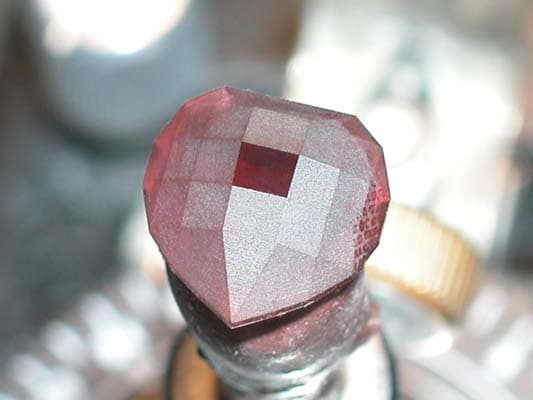
Take another look at the finished gem below. The crown on this stone really polished in and lined up square without much trouble.

Most checkerboards usually take a little tweaking to get all the checkers in an even line. So, don't be surprised if you need to make some adjustments during the polishing stage.


When you join the IGS community, you get trusted diamond & gemstone information when you need it.
If you want to cut your own "Heart Squared," you can find information on it here.
I picked a light pink Nigerian tourmaline to proof cut this checkerboard heart. In my opinion, pink and red are the two best colors for this heart. This design would also work well in a piece of lab-created red beryl or alexandrite if you want to cut something unique.
I recommend cutting this heart in large-sized rough, just because it's easier to see the checkers and make the design work. 10 mm and up would make a good size.
As you can see, my rough wasn't too large. Still, I got quite a good yield from it.
When you dop a stone to cut this design, set the point of the heart/rough at the 96 index (to be cut), if you have a keyed dop. Of course, this will vary depending on your machine. Just be aware that you may need to orient the rough.
I cut P1 in to about where I think the centerpoint will be. No, I didn't use the cam point. I very seldom do. For me, it's just easier to cut (but I've had a lot of practice).
Make sure to cut the checkerboard heart pavilion centered over the dop, like most hearts. You can cut all the pavilion tiers to 43° to create a temporary center. Then, cut them to their proper angles.
To cut these tiers, I switched to a fine 1,2000 lap. Especially on small stones, the angles are close on the pavilion, so it's very easy to over-cut.
The checkerboard heart needs a good, accurate centerpoint, since it lines up this design. Later on, the girdle facets and the checkerboard facets on the crown depend on a good centerpoint (pavilion) to line up easily.
Notice that the P2 and P3 tiers are close in angle to each other and cut fast, especially in small stones. (This is one reason I recommend cutting this design in a large size).
As you can see, everything is lining up.
When you're cutting this design, it's important to get the girdle and pavilion meetpoints lined up to each other correctly. The checkerboard crown, while not that difficult to cut, definitely benefits from taking a little more time and aligning the pavilion and girdle to each other correctly at this stage. (Like all checkerboard crowns, some tweaks and adjustments will be needed to get exact meetpoints when cutting and/or polishing the crown).
I cut the P15(G) to meet the rest of the girdle. Note that I cut the P15(G) before the P16 to establish the meetpoints for the P16.
At this point, all the girdle facets are cut. As you can see, the stone now looks like a heart.
I prefer to polish the girdle first and started with the P15(G) facet. However, this is a personal preference. You can certainly polish in another order or even start with the pavilion. I just always find it easier to polish the girdles first.
I set the angle at 89.8° or so and only polished the bottom half of the girdle facets. There's no need to spend time and energy polishing the whole girdle facet. You only need to polish the part of the girdle that will remain after cutting in the crown. In other words, only polish the part of the girdle you're going to keep.
After polishing all the girdle facets, I started polishing the pavilion.
I polished the P1 facets first, partly because they establish the pavilion. Polishing the P1 tier gives me a good, sharp centerpoint for polishing the rest of the pavilion tiers. It really helps to have an easy-to-see pavilion point to polish to as you go around the pavilion.
As you can see, polishing the P1 tier gives a nice, defined centerpoint.
Next, I go around and polish all the pavilion tiers, except the P15 tier. I left it for last, since it's easier to polish those facets into a final meetpoint when everything else is polished in.
As you can see, all the pavilion tiers are polished, and the pavilion centerpoint is sharp and clear. I also polished in the P17 facet before the P15. This makes my girdle meets sharp, and I can just polish (float) the P15 facets in, so that everything is sharp and centerpointed at both the girdle and pavilion point.
At this stage, the pavilion is ready to transfer. Now is a very good time to examine all the pavilion and girdle tiers and make sure they're all polished. The checkerboard heart design has so many tier and angle changes that you can easily miss a facet. After transferring the stone, your odds of "finding" a facet you missed and polishing it are remote. Even if you succeed, it's a major pain, so check now before you take the dop out of the quill.
Notice that I used the 48 index girdle facet to align the stone after transfer. Why? Because the 48 index is the longest girdle facet and, therefore, the easiest to line up. I used a V-dop on the transfer because my centerpoint wasn't quite centered. Since V-dops don't have a key, I could just use any girdle facet I wanted. However, if you use a keyed dop, make sure you align the point of the heart correctly. Remember, the transfer reversed things.
Next, I cut in the girdle break tiers.
Make sure you leave enough crown so you don't cramp yourself when cutting in the breaks. So, if anything, err on the side of more crown material rather than less. The crown tier facets on this design, because of the heart shape, will look a little different as you cut them in.
Here's a tip: cut in all the crown breaks using 52.33°, the C7 angle. This makes lining up the crown so much easier. After lining up the crown, I re-cut all the crown tiers at their respective angles.
Cut these tiers slowly. This is important. A mistake and/or over-cut at this time will cost you a lot of work and girdle thickness you likely don't have. The points, particularly at the girdle, are easy to over-cut.
At this stage, I've cut all the crown tiers, except for C13.
Notice that where the C13 tier cuts in, you can see little points. You just need to rub in the C13 tier gently. These shallow facets won't take much cutting. I leave them for last.
I also roughed in the table. (Note: the picture above doesn't show the table. The flat you see is just the flat spot that was ground on the rough for dopping).
At this point, the crown is roughed in. If you're cutting your own stone, you'll now see some alignment problems, but these are minor and pretty typical of almost any checkerboard cut. For example, all the checkers may not line up evenly the first time. However, the checkers will get lined up in the next fine cutting stage. If necessary, you can tweak them during polishing.
After cutting all the crown tiers with a fine lap, I polished the table.
As you can see, now the checkerboards are all pretty much lined up. I polished the table at this time because this is where all the meets have to be perfect. Any meetpoint errors will be obvious on the table facet. You can't fudge the meets on the table of a checkerboard design, particularly this one. So, polish the table first, then line up the checkers as you polish towards the girdle.
This is a good habit to develop when you're cutting any checkerboard heart design, because you can tweak and align facets as you go along. If you have a problem, you can minimize it around the girdle, where it won't show. This design isn't really all that hard to polish, but it will take a little tweaking here and there to get all the checkers lined up evenly.
If you look closely at the picture above, a few places need aligning. However, the checkers aren't really as far off as they may appear. The combination of polished and unpolished checkers makes them appear more out of alignment than they really are.
Take another look at the finished gem below. The crown on this stone really polished in and lined up square without much trouble.
Most checkerboards usually take a little tweaking to get all the checkers in an even line. So, don't be surprised if you need to make some adjustments during the polishing stage.


